Why Consumer Mesh Limits Business Growth (And How to Migrate to Omada)
Replace Eero or Google Nest with TP-Link Omada for VLAN isolation and business stability. Complete migration guide with verified February 2026 pricing and guest network setup.

Consumer mesh systems like Eero and Google Nest WiFi are designed for residential use. When deployed in business environments with 75+ active devices, payment terminals, and guest network requirements, these systems typically struggle with stability and lack the VLAN segmentation required for PCI-compliant security.
Affiliate Disclosure: This article contains affiliate links. If you make a purchase through these links, we may earn a small commission at no extra cost to you.
This guide covers migrating from consumer mesh to TP-Link Omada, a Software-Defined Networking (SDN) platform that provides enterprise features at small business prices. We'll provide specific hardware configurations, verified pricing for February 2026, and step-by-step VLAN setup for properly isolating guest WiFi from business systems like credit card terminals.
Why Do Consumer Mesh Systems Fail in Business Environments?
Consumer mesh systems typically hit a performance ceiling at 50-60 connected devices and lack the VLAN segmentation required for PCI-compliant security.
While systems like Eero and Google Nest WiFi Pro are excellent for residential use, they are not designed for the density of a business network. The same office conditions — airtime contention, building material interference, and wireless backhaul limits — that cause office WiFi to underperform are amplified when consumer mesh hardware tries to handle them.
Hardware Limitations of Residential Mesh
Consumer mesh hardware faces two fundamental constraints in business environments: CPU capacity and wireless backhaul bandwidth.
Processing Limitations: Consumer hardware often relies on general-purpose CPUs that degrade when handling 100+ active sessions. A typical small business network includes:
| Device Category | Typical Count |
|---|---|
| Employee devices (phone + laptop) | 30 devices (15 employees) |
| POS terminals and printers | 5-10 devices |
| Security cameras | 8-16 devices |
| VoIP phones | 10-15 devices |
| IoT (door locks, thermostats, etc.) | 10-20 devices |
| Customer guest devices | 20-40 devices (peak hours) |
| Total | 83-131 devices |
Google Nest WiFi (older models) shows degradation above 50-60 devices. Eero systems typically handle 75-100 devices before experiencing slowdowns. While Google Nest WiFi Pro is rated for 300 devices, real-world business deployments see performance issues around 100-150 active devices due to sustained traffic loads.
Wireless Backhaul Degradation: In a busy office, using wireless hops between nodes consumes up to 50% of available bandwidth. Business networks require wired backhaul (Ethernet) to maintain gigabit speeds. Each wireless hop reduces throughput:
- First hop: Client → Primary node = Full speed
- Second hop: Primary node → Satellite node = 50% speed loss
- Third hop: Satellite → Another satellite = 75% speed loss
Security Gaps
Most mesh systems lack true VLAN support. They cannot segment your credit card terminals from a guest's infected smartphone—a critical requirement for PCI DSS compliance.
What businesses need: Credit card terminals on VLAN 10, guest WiFi on VLAN 20, with Layer 3 firewall rules preventing cross-VLAN access.
What consumer mesh offers: Basic "guest network" isolation at the wireless layer only. Wired devices and advanced segmentation policies are not supported.
Subscription Costs
Consumer mesh vendors increasingly gate professional features behind subscriptions:
- Eero Plus: $99.99/year for ad blocking, advanced parental controls, and threat detection
- Eero Plus 100: $199.99/year (adds 100GB internet backup data)
Five-year cost: A $599 Eero Max 7 becomes $1,099 with subscriptions. These subscriptions don't provide the VLAN isolation businesses actually need for security compliance.
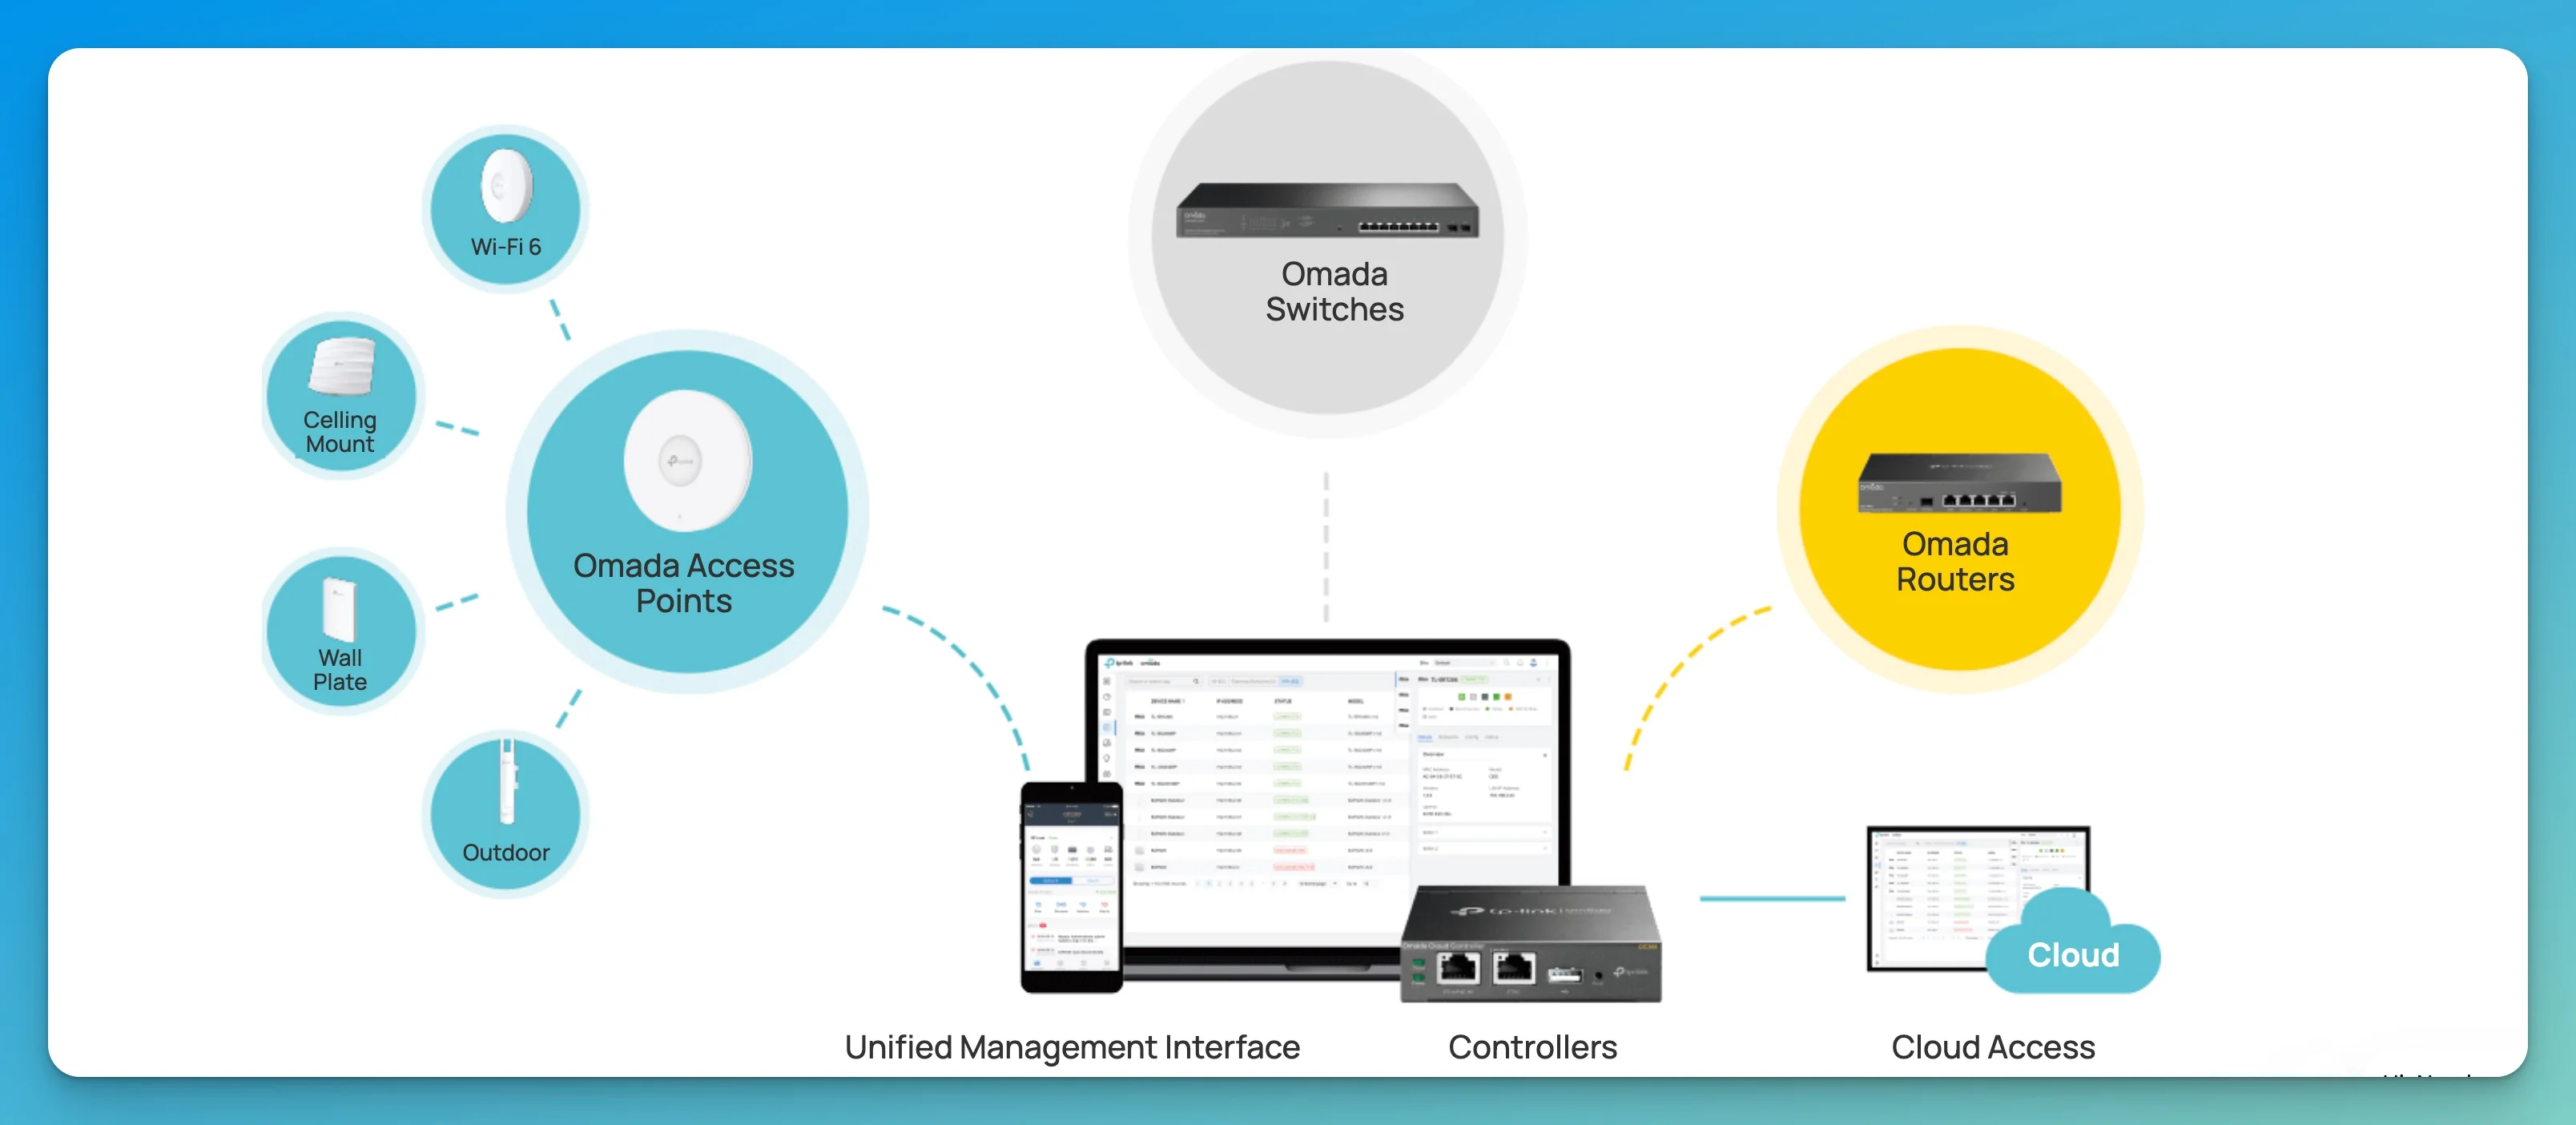
What Is Software-Defined Networking (SDN)?
SDN decouples network control from hardware, allowing a single software controller to manage configuration, security updates, and roaming for all access points simultaneously.
Unlike mesh nodes that make independent decisions, Omada's SDN architecture uses a central controller to direct traffic.
Centralized Management
Update a WiFi password or block a client once, and the change propagates instantly to every access point. Create a new VLAN for IoT devices, and all access points adopt the configuration without individual device login.
Seamless Roaming
The controller actively hands off devices between access points based on signal strength, preventing the "sticky client" issue common in mesh setups where devices cling to distant nodes instead of connecting to closer ones.
Scalability
You can mix and match WiFi 6 and WiFi 7 access points without breaking the network architecture. Adding a new access point requires only physical installation and one-click adoption in the controller.
Why Omada for Business Migration
Omada Cloud Essentials (Free): TP-Link provides free cloud hosting for network management through Omada Cloud Essentials. No additional hardware purchase required to get started. The free tier includes basic management, up to 5 sites, and 7-day log retention.
Competitive Pricing: Access points and routers typically cost 10-20% less than equivalent UniFi hardware while delivering similar performance.
Lifetime Warranty: TP-Link Omada business equipment carries a Limited Lifetime Warranty, compared to 1-year warranties typical of consumer mesh systems. This significantly reduces long-term replacement costs.
Fast Roaming Support: Omada supports 802.11r/k/v standards for seamless handoff between access points, eliminating the "sticky client" issue where devices cling to distant nodes instead of connecting to closer ones.
UniFi Alternative
We frequently recommend UniFi for clients who value ecosystem integration (cameras, access control, etc.) or prefer US-based hardware vendors. Both platforms deliver professional networking at small business prices. See our UniFi vs Omada comparison for detailed platform analysis.
Recommended TP-Link Omada Configurations (2026)
We recommend the EAP670 for value-focused deployments or the EAP773 for future-proof WiFi 7 performance, paired with the ER707-M2 Multi-Gigabit router.
The following configurations replace a typical 3-node mesh system for businesses up to 3,500 square feet.
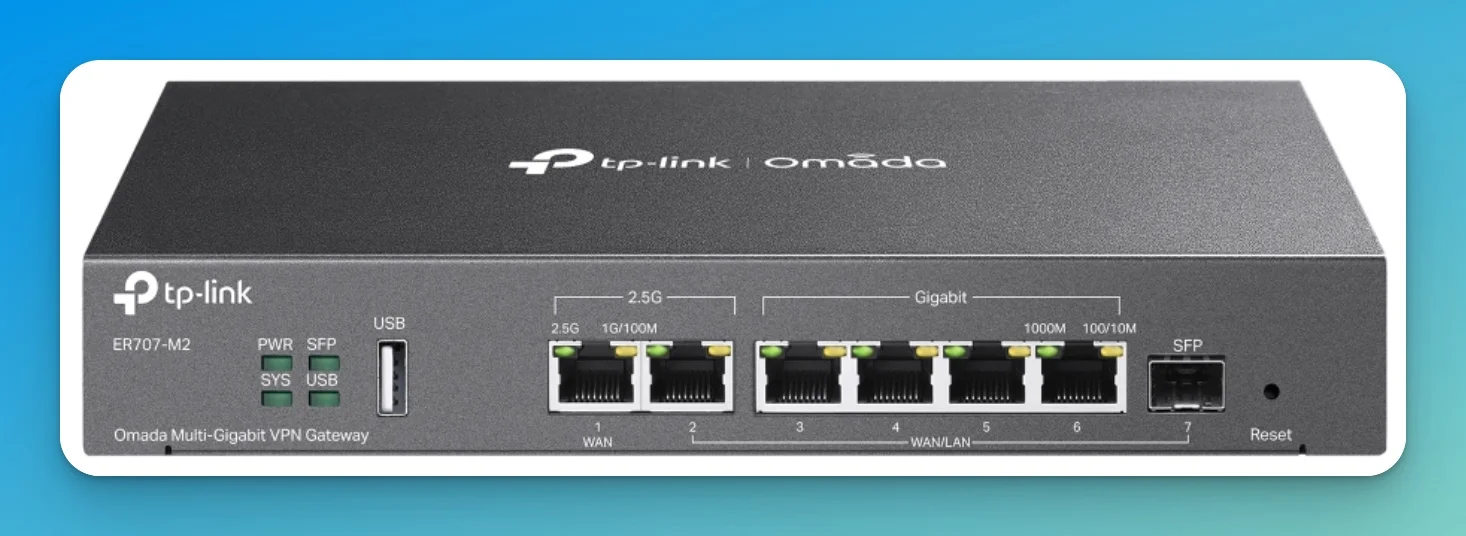
TP-Link Omada ER707-M2 Multi-Gigabit VPN Router - Core component in all configurations
Best Value Configuration: WiFi 6 (~$600)
Ideal for cafes and small offices looking to stabilize operations.
| Component | Product | Price (Feb 2026) | Purpose |
|---|---|---|---|
| Router | ER707-M2 | ~$100 | Dual 2.5G ports, supports multiple WANs |
| Switch | TL-SG2210MP | ~$195 | 8-Port Gigabit PoE+ (150W budget) |
| Access Points | 2× EAP670 | 4×4 MIMO AX5400, high density support | |
| Controller | Omada Cloud Essentials (Free) or OC200 | $0-99 | Cloud or local management |
| Total | ~$595-695 |
Note: EAPs do not include power adapters. You must use a PoE switch (recommended) or purchase separate PoE injectors (such as the TP-Link TL-POE260S 2.5G PoE+ Injector, ~$35 each for testing single APs).
What you get:
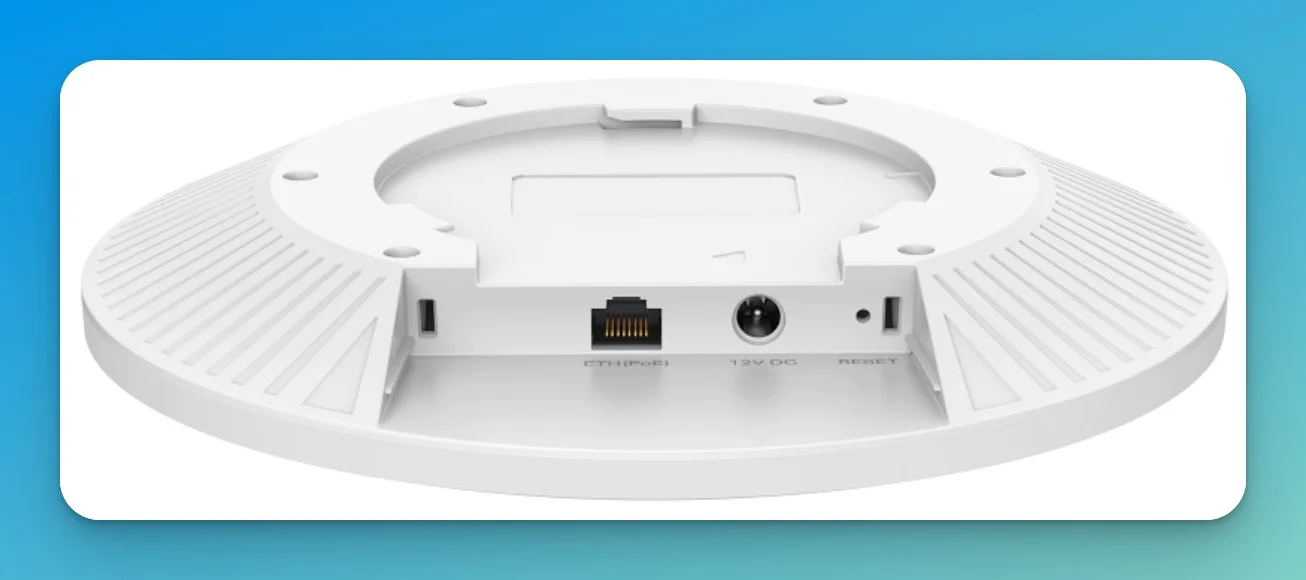
- EAP670: WiFi 6 with 2.4 GHz and 5 GHz bands, 2.5G Ethernet uplink, ceiling or wall mount
- Note: Look for Hardware Version 2 (V2), which is 50% thinner (32mm vs 64mm) than the original model for a cleaner, more professional look in office environments.
- Gigabit switch: Powers both access points via PoE (no separate power adapters needed)
- Free cloud controller: Manage network from web browser or smartphone app
Performance note: Gigabit switch caps each access point at 1 Gbps wired speed, sufficient for most WiFi 6 clients (typically 700-900 Mbps real-world throughput).
What's Not Included: EAPs do not ship with Ethernet patch cables. You'll need to provide Cat5e, Cat6, or Cat6a cables from your switch to each access point location.
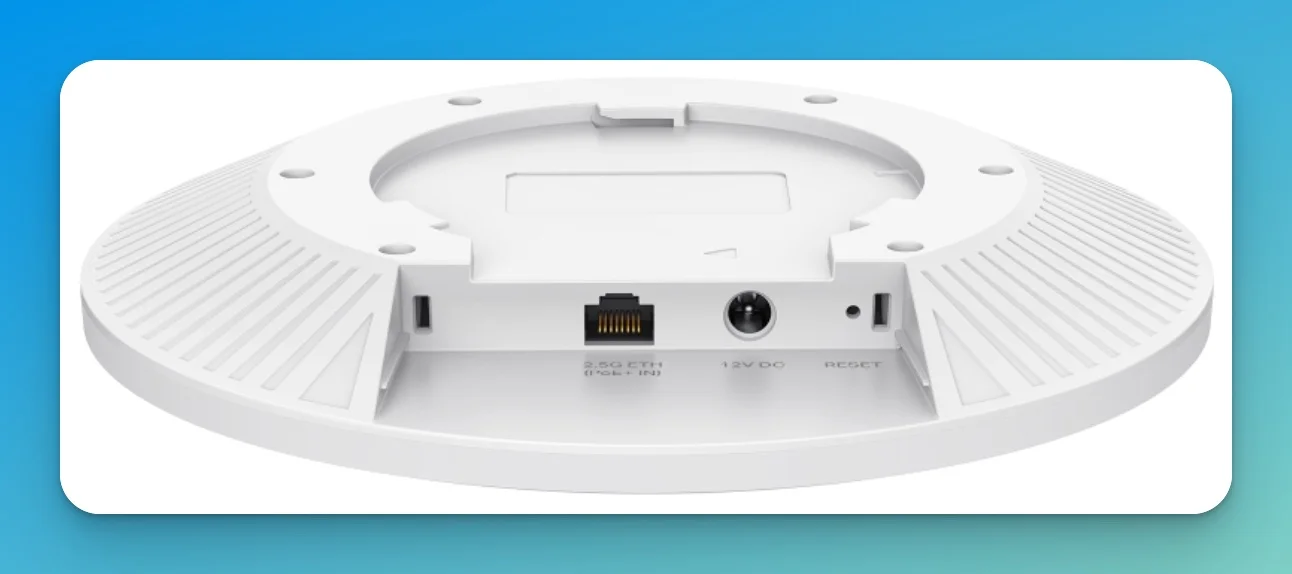
EAP670 WiFi 6 Access Point (4×4 MIMO)
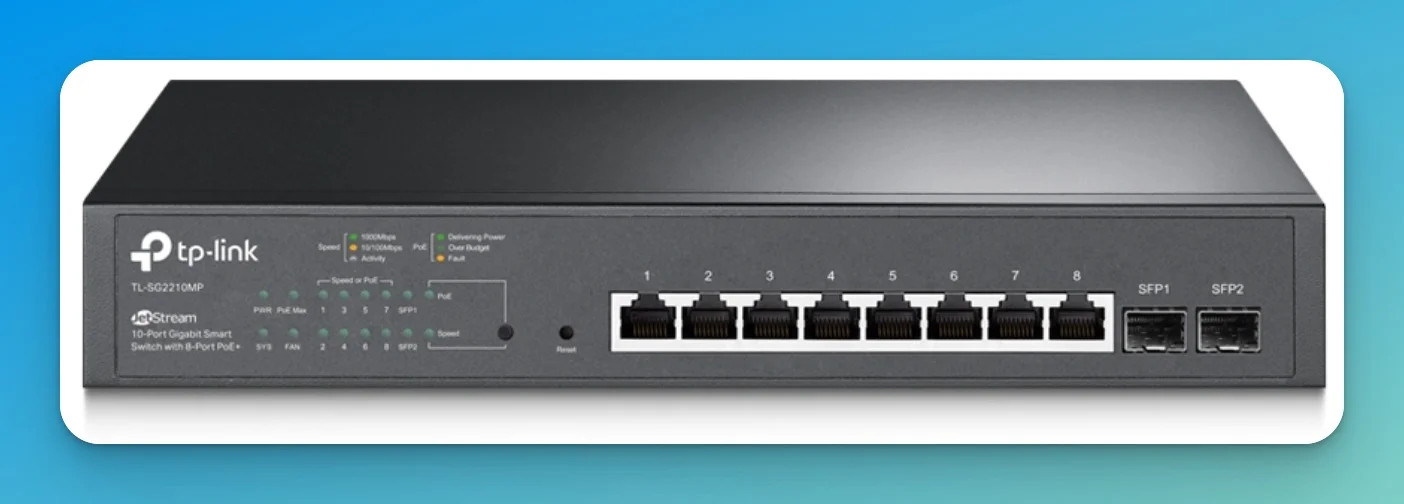
TL-SG2210MP 8-Port PoE+ Switch (150W Budget)
Hardware Controller Recommended
The OC200 hardware controller (~$99) is strongly recommended for business deployments. Unlike the Omada Cloud Essentials (free tier), it keeps local logs and management active even during internet outages, whereas the Cloud controller loses contact with your devices entirely if the ISP goes down. This means you can still make configuration changes, view logs, and troubleshoot issues using the OC200's local web interface even when internet is unavailable.
Privacy advantage: The OC200 is often preferred by privacy-conscious businesses who don't want a cloud dependency. All management traffic stays local to your network, with no data transmitted to TP-Link cloud servers.
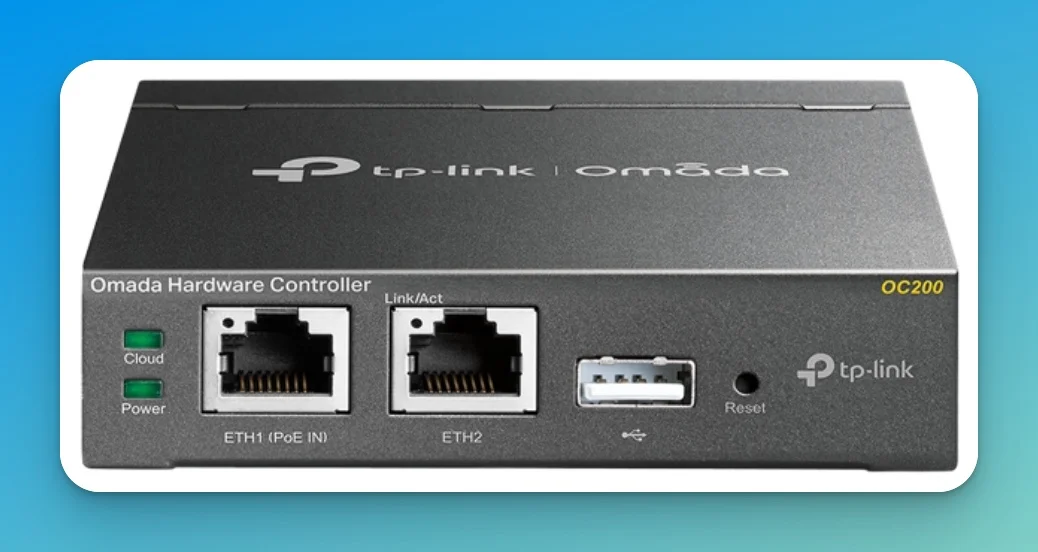
OC200 Hardware Controller - Local management without cloud dependency
Future-Proof Configuration: WiFi 7 (~$1,045)
For creative agencies or tech-heavy environments transferring large files.
| Component | Product | Price (Feb 2026) | Notes |
|---|---|---|---|
| Router | ER707-M2 | ~$100 | Dual 2.5G ports, VPN support |
| Switch | TL-SG3210XHP-M2 | ~$465 | 2.5G PoE+ (Bottlenecks AP to 2.5G) |
| Access Points | 2× EAP773 | WiFi 7 Tri-Band (10G Port) | |
| Controller | OC200 | ~$99 | Dedicated local management |
| Cable (optional) | Cat6a bulk box | ~$180 | 1000ft pure copper (avoid CCA for PoE) |
| Total | ~$1,044-1,224 |
Switch Selection Rationale
While the EAP773 supports 10GbE, this switch negotiates at 2.5GbE. This is sufficient for current internet speeds and real-world WiFi 7 throughput (typically 2-3 Gbps sustained) but effectively caps the AP's theoretical maximum throughput.
Why not 10G PoE? Enterprise-grade 10G PoE switches cost $800-1,200+, which would push this configuration beyond most small business budgets. This configuration allows for a future switch upgrade without replacing access points, which justifies the "Future-Proof" designation—the expensive APs remain relevant when you're ready to add a 10G switch.
Why upgrade:
- EAP773: WiFi 7 tri-band with 6 GHz support, 10G Ethernet port
- 2.5G switch: Each access point gets full 2.5 Gbps wired backhaul
- 5-7 year lifespan: WiFi 7 clients will become standard; this configuration won't need replacement
EAP773 WiFi 7 Tri-Band Access Point - Future-proof option with 10G capability
Budget WiFi 7 Configuration (~$475)
High efficiency without the multi-gig wired cost.
| Component | Product | Price (Feb 2026) | Purpose |
|---|---|---|---|
| Router | ER707-M2 | ~$100 | Multi-gig gateway |
| Switch | TL-SG2210MP | ~$195 | 8-port Gigabit PoE+ |
| Access Points | 2× EAP723 | 2×2 MIMO Dual-band WiFi 7 | |
| Controller | Omada Cloud Essentials (Free) | $0 | Cloud management |
| Total | ~$475 | Lacks 6GHz band |
Density Consideration
The EAP723 uses 2×2 MIMO (2 spatial streams), making it suitable for low-density areas like small retail shops, break rooms, or waiting areas. For busy open offices with 20+ simultaneous users, the EAP670 (4×4 MIMO on 5GHz) will deliver better performance despite being older WiFi 6 technology. WiFi 7's efficiency gains don't fully compensate for reduced antenna count in high-density scenarios.
What you get: WiFi 7 efficiency improvements (4K-QAM, Multi-Link Operation) on 2.4 GHz and 5 GHz bands. Wired backhaul capped at 1 Gbps by Gigabit switch.
Installation Considerations
Before ordering, assess your existing infrastructure:
Ethernet Cabling:
- Existing Ethernet runs? If your current mesh nodes use wired backhaul (Ethernet cables between nodes), you can reuse these cables for access points. This is the ideal scenario. Cat5e cabling typically supports up to 2.5G speeds over runs under 50 meters (164 feet) and works fine for most deployments—no need to rewire older buildings unless you specifically need 10G capability.
- No Ethernet? You have two options:
- Hire an electrician/low-voltage installer to run Cat6 or Cat6a cables to access point locations (recommended) - ~$500-1,500 for 2-4 runs
- Use wireless uplink (one AP wired, others connect wirelessly)—performance similar to your current mesh system
Mounting:
- Ceiling mount (preferred): Provides best coverage pattern
- Wall mount (acceptable): EAP670 and EAP773 can mount to walls using included brackets
- Desktop (not recommended): Access points are designed for ceiling/wall installation
- What's Included: Mounting brackets and screws come in the box
- What's NOT Included: Ethernet patch cables (you must provide these separately)
Power:
- PoE switches power access points through the Ethernet cable—no separate power adapters needed
- Router needs standard power outlet
- Switch needs standard power outlet
Testing with One AP First: If you want to test a single access point before committing to the full system, you can use a 2.5G PoE+ injector (such as the TP-Link TL-POE260S, ~$35) to power one AP without purchasing the full PoE switch. This allows you to verify coverage and performance before ordering additional hardware.
Wired Backhaul Critical Success Factor
A critical success factor for this upgrade is wired Ethernet backhaul between access points. Using wireless uplink (access points connecting wirelessly to each other) replicates the same performance limitations as mesh systems. If you can't run Ethernet cables, the upgrade provides minimal benefit.
Cable Requirements:
- Cat6 or Cat6a: Recommended for 2.5G-10G speeds
- Cat5e (existing): Typically supports up to 2.5G speeds and works fine for most deployments; rewiring not required unless you need 10G
- Professional installation: Budget $500-1,500 for 2-4 cable runs if needed
Step-by-Step Setup: Isolated Guest Network for Credit Card Terminals
Proper network isolation addresses one of the primary limitations of consumer mesh systems. This configuration creates a guest network that provides customers with internet access while preventing access to business devices such as credit card terminals.
The Scenario
Your business network:
- Back-office computers
- POS terminals and credit card readers
- Office printers
- Security camera system
- VoIP phones
Your guest network:
- Customer smartphones and tablets
- Customer laptops
- Temporary contractor devices
Security requirement: Guests get internet access. Strict firewall rules ensure guests cannot access business resources.
Omada VLAN Configuration
The Omada controller simplifies VLAN configuration through a web-based interface. While VLANs involve technical concepts, the configuration process consists primarily of form completion.
Step 1: Initial Controller Setup
- Create Omada Cloud account at omada.tplinkcloud.com (or set up OC200 hardware controller)
- Adopt your devices:
- Power on router, switch, and access points
- Controller discovers devices automatically
- Click "Adopt" for each device
- Wait 2-3 minutes for firmware updates
- Configure internet connection (WAN settings on router)
Step 2: Create Business Network (Main VLAN)
Navigate to Settings → Wired Networks → Create New Network:
| Setting | Value | Why |
|---|---|---|
| Network Name | Business Main | Internal label |
| Purpose | Corporate | Omada optimizes for business traffic |
| VLAN ID | 10 | Standard business VLAN |
| Gateway/Subnet | 192.168.10.1/24 | IP range for business devices |
| DHCP | Enabled | Auto-assign IPs to business devices |
Create corresponding WiFi network: Navigate to Settings → Wireless Networks → Create New WiFi:
- Network Name (SSID): Your-Business-WiFi
- Password: Strong WPA3 password
- Security: WPA3-SAE (or WPA2/WPA3 Mixed for older devices)
- Assign to VLAN: Business Main (VLAN 10)
Step 3: Create Guest Network with Isolation
Navigate to Settings → Wired Networks → Create New Network:
| Setting | Value | Why |
|---|---|---|
| Network Name | Guest Network | Internal label |
| Purpose | Guest | Critical—enables automatic isolation |
| VLAN ID | 20 | Separate from business VLAN |
| Gateway/Subnet | 192.168.20.1/24 | IP range for guest devices |
| DHCP | Enabled | Auto-assign IPs to guests |
| Client Isolation | Enabled (optional) | Prevents guests from seeing each other |
| Bandwidth Limit | 50 Mbps down / 10 Mbps up (optional) | Prevents guests from saturating connection |
Create guest WiFi network: Navigate to Settings → Wireless Networks → Create New WiFi:
- Network Name (SSID): Guest-WiFi or YourBusiness-Guest
- Password: Simple password you can share verbally (or no password for open guest WiFi)
- Security: WPA2-PSK (or Open for no password)
- Assign to VLAN: Guest Network (VLAN 20)
- Guest Portal: Enabled (optional—adds terms of service splash page)
Step 4: Configure Firewall Rules (Auto-Applied)
When you set Purpose: Guest in Step 3, Omada automatically creates firewall rules:
✅ Guest VLAN → Internet: Allow (guests can browse web, use apps)
❌ Guest VLAN → Business VLAN: Deny (guests cannot access 192.168.10.x range)
❌ Guest VLAN → Router management: Deny (guests cannot access controller)
Verify rules: Navigate to Settings → Firewall → LAN Rules—you'll see auto-created guest isolation rules.
Step 5: Test Isolation
This is critical. Don't skip testing:
- Connect business device (your laptop) to Business WiFi
- Note your laptop's IP address (should be 192.168.10.x)
- Connect guest device (personal phone) to Guest WiFi
- Note phone's IP address (should be 192.168.20.x)
- From guest device, attempt to ping business device:
Expected result: Request timeout (blocked by firewall)ping 192.168.10.100 - From guest device, browse to google.com Expected result: Success (internet access allowed)
- From business device, ping router: Should succeed
- From guest device, ping router: Should fail or timeout
PCI Compliance Note
Proper VLAN isolation is a requirement for PCI-DSS compliance (Payment Card Industry Data Security Standard). If you process credit cards, consult with your payment processor or PCI assessor to ensure your network configuration meets specific compliance requirements. Network segmentation is typically required for businesses processing more than certain transaction volumes.
Optional: Guest Portal with Terms of Service
Navigate to Settings → Guest Portal to configure a splash page:
- Portal Type: Simple Password or Terms of Service
- Custom Logo: Upload your business logo
- Terms text: "By connecting, you agree to use this network responsibly..."
- Redirect URL: Your business website (after guests accept terms)
This adds a professional touch and provides legal protection by requiring guests to acknowledge acceptable use policies.
Recommended: Enable Fast Roaming
Navigate to Settings → Wireless Networks → [Your Network] → Advanced Settings:
- Fast Roaming (802.11r): Enable
- Force-Disassociation (802.11k/v): Enable
These standards enable seamless handoff between access points based on signal strength. This is the "magic" feature that fixes the sticky client issue where devices cling to distant nodes instead of switching to closer access points. Enable for both business and guest networks.
Comparison to Consumer Mesh Guest Networks
Consumer mesh (Eero, Google Nest) guest networks:
- Basic isolation at WiFi layer only
- Guests can't see business WiFi devices
- BUT: Guests still share same broadcast domain for wired devices
- No VLAN tagging—cannot separate POS terminals from guest network at Layer 2
- No customizable firewall rules
Omada VLAN guest networks:
- True Layer 2 and Layer 3 isolation
- Separate broadcast domains (guests can't discover devices via ARP/Bonjour)
- Wired and wireless devices properly segmented
- Customizable firewall rules per VLAN
- Can create multiple guest networks with different policies
For a business handling credit card transactions, this difference is substantial.
How to Migrate from Mesh to Omada with Minimal Downtime
To minimize disruption, pre-configure your Omada controller and access points using a temporary "staging" SSID before physically replacing your existing mesh nodes.
Pre-Configuration (1-2 Days Before Migration)
- Connect your new router and APs to a test bench. Use a spare switch or direct connections to adopt them into the Omada controller.
- Configure your VLANs (e.g., VLAN 10 for POS terminals, VLAN 20 for Guest WiFi).
- Create a staging SSID like "YourBusiness-New" to test connectivity without disrupting current operations.
- Update firmware on all devices through the controller interface.
Parallel Installation (During Business Hours)
If you have available Ethernet runs, mount and connect the new APs while the old mesh system is still running. This allows you to test coverage and placement without downtime.
The Swap (Maintenance Window: 30-60 Minutes)
Optimal timing: Before business opens, after close, or during slowest period.
- Photograph existing setup (cable connections, WiFi settings) for rollback documentation.
- Power down mesh system and unplug from modem.
- Connect Omada router to modem WAN port.
- Switch SSIDs: If you use the exact same SSID and password as your old network, most devices will reconnect automatically within minutes.
- Test key systems: POS terminals, VoIP phones, security cameras.
- Verify VLAN isolation: From guest device, attempt to ping business network (should fail).
Rollback Plan
Keep your old mesh system for 30 days. If serious issues arise:
- Power down Omada system
- Reconnect old mesh system per photographs
- Wait 5-10 minutes for stabilization
Common Migration Issues
| Issue | Solution |
|---|---|
| Legacy devices won't connect | Enable WPA2/WPA3 Mixed Mode in WiFi security settings |
| 2.4 GHz devices can't see network | Create band-specific SSID (separate 2.4 GHz and 5 GHz networks) |
| IoT devices fail adoption | Temporarily disable 5 GHz band, adopt device, then re-enable |
| VoIP phones lose registration | Assign static DHCP reservations to phone MAC addresses |
| Printers become unreachable | Check if printer IP changed; update printer drivers with new IP |
Professional Installation Option
Professional installation eliminates downtime risk and includes cable management, optimal AP placement, and staff training. Typical costs:
- Basic installation (pre-cabled): $300-500
- Installation + cabling (2-4 runs): $1,000-1,800
- Complex deployment (6+ runs, multiple floors): $2,000-4,000
Contact our IT services team for installation assistance.
What You Gain vs What You Give Up
Professional networking provides stability and security but requires initial technical investment.
What You Gain
Network Stability:
- No more weekly reboots
- Handles 100+ devices per access point without degradation
- Wired backhaul eliminates wireless mesh bottlenecks
- Professional-grade hardware designed for 24/7 operation
True Network Isolation:
- VLANs separate business, guest, and IoT traffic
- Firewall rules prevent guest access to business systems
- Better PCI compliance for credit card processing
- Granular control over every device and network
Zero Subscription Fees:
- No ongoing costs for features ($0 vs $99.99/year for Eero Plus)
- All features included with hardware purchase
- Omada Cloud Essentials (free tier) sufficient for most businesses
- Five-year cost: ~$595 vs $1,099 for Eero with subscriptions
Professional Management:
- View all connected devices in real-time
- Block specific clients or limit bandwidth
- Generate reports on network usage
- Manage multiple locations from single dashboard (if you expand)
Scalability:
- Add access points without changing architecture
- Upgrade individual components without replacing entire system
- Supports 10G wired infrastructure when ready
- Can grow from 2 APs to 50+ APs on same controller
What You Give Up
Setup Complexity:
- Mesh: 15 minutes (scan QR code, done)
- Omada: 2-3 hours initial setup + learning curve
Learning Curve:
- Need to understand basic concepts (VLANs, DHCP, firewall rules)
- More configuration options = more potential to misconfigure
- Troubleshooting requires some networking knowledge
Support Model:
- Mesh: Phone support available, usually consumer-friendly
- Omada: Community forums, email tickets, no phone support for small business tier
- You become your own IT administrator (or hire one)
App Simplicity:
- Mesh apps are intentionally simplified (fewer options)
- Omada apps expose more settings—can feel overwhelming initially
- Trade-off: More power = more complexity
Honest Assessment
The migration from mesh to Omada isn't "objectively better" in all dimensions. You're trading setup simplicity for operational stability, and subscription convenience for ownership control.
Make this migration if:
- You're experiencing frequent network issues with current mesh
- You need proper guest network isolation (PCI compliance, security)
- Your device count exceeds 75-100 active devices
- You're comfortable learning basic networking concepts (or willing to hire help)
- Subscription fees bother you ($99+/year adds up over 5-7 years)
Stick with mesh if:
- Current system works reliably (under 50 devices, residential-style usage)
- Zero technical knowledge and no interest in learning
- Budget can absorb subscription fees without concern
- Prefer phone support for any issues
- Don't need VLAN isolation or advanced features
When to Call for Help vs DIY
This migration is DIY-friendly for many business owners, but professional installation makes sense in certain scenarios.
DIY-Friendly Situations
You can handle this yourself if:
- Comfortable following technical guides (like IKEA furniture assembly level)
- Building has existing Ethernet cable runs to access point locations
- 2-3 hours available for setup during slow business period
- Have basic troubleshooting skills (can Google error messages, follow forum posts)
- Business can tolerate 30-60 minutes of downtime if something goes wrong
Recommended resources for DIY:
- TP-Link Omada official setup videos (YouTube)
- r/TPLink subreddit community
- Omada official forums
- Our small business network setup guide
- Network security audit checklist for post-installation verification
When to Hire Professional Help
Call an installer if:
Physical Installation Challenges:
- Need to run Ethernet cables through walls, ceilings, or between floors
- Building construction makes cable routing difficult (concrete walls, metal studs)
- Access points need outdoor mounting or weatherproof enclosures
- Require proper cable management (conduit, cable trays, patch panels)
Business Criticality:
- Cannot tolerate any network downtime during business hours
- Handle high-volume credit card processing (need PCI-validated configuration)
- Multi-location deployment requiring coordinated cutover
- Liability concerns if something goes wrong
Technical Complexity:
- Need VLANs for multiple departments with complex inter-VLAN routing rules
- Want site-to-site VPN connecting multiple offices
- Integration with existing network equipment (firewall, switches, etc.)
- Require detailed network documentation for compliance
Training Requirements:
- Want hands-on training for staff to manage network ongoing
- Need documentation of network configuration for business continuity
- Prefer professional validation that everything is configured correctly
Typical installation service includes:
- Site survey and cable routing planning
- Ethernet cable installation and termination
- Access point mounting and testing
- Network configuration (VLANs, WiFi, firewall)
- Documentation of configuration
- Staff training on basic management tasks
Frequently Asked Questions
Can I test Omada while keeping my mesh system running?
Yes, but not simultaneously on the same network. Recommended approach:
- Order Omada equipment
- Set up Omada system after hours (using different WiFi names)
- Test with a few devices while mesh remains primary network
- Cut over to Omada once satisfied it works correctly
- Keep mesh system as backup for 30 days
You cannot run both systems as active networks simultaneously—this creates IP conflicts and routing issues.
Do I need to run new cables, or can I use existing mesh locations?
If your mesh nodes currently use Ethernet backhaul: You can likely reuse these cables for access points. This is the ideal scenario—your building is already wired correctly.
If your mesh nodes use wireless backhaul: You have two options:
- Run new Ethernet cables to access point locations (strongly recommended)
- Use wireless uplink (one AP wired, others wireless)—but this replicates mesh performance characteristics you're trying to escape
The wired backhaul is the critical upgrade. Without it, Omada performs similarly to your existing mesh.
What happens if the cloud controller goes down?
Your network continues operating normally:
- WiFi networks remain active
- Devices stay connected
- Internet access unaffected
- VLANs and firewall rules continue working
What stops working:
- Cannot make configuration changes
- Cannot view live statistics/connected devices
- Cannot adopt new devices
Mitigation: The OC200 hardware controller (~$99) provides local management that doesn't depend on cloud services. It can take over if cloud controller experiences issues.
Can I manage Omada from my phone?
Yes. The Omada mobile app (iOS and Android) provides:
- View connected clients
- Block devices
- Reboot access points
- View basic network statistics
- Make WiFi configuration changes
Limitations: Advanced configuration (VLANs, detailed firewall rules) works better via web browser on computer. Mobile app is great for monitoring and basic management.
How do I add more access points later as business grows?
- Purchase additional access point (same model or any compatible Omada AP)
- Connect via PoE to switch
- Controller auto-discovers new AP
- Click "Adopt" in controller
- Assign to existing WiFi networks
- Done in 10-15 minutes
Access points inherit configuration from controller—no manual setup required. This is one of SDN's biggest advantages.
Will my existing devices work with Omada?
Yes. Omada uses standard WiFi protocols (802.11 a/b/g/n/ac/ax/be) that all devices support. Your current devices will connect normally.
Device compatibility concerns:
- Very old devices (pre-2010) may only support WPA1—if so, you may need to temporarily enable WPA2/WPA3 mixed mode
- Some IoT devices are finicky about 5 GHz vs 2.4 GHz—Omada can create band-specific SSIDs if needed
- Most modern devices work perfectly with no special configuration
Do I need to inform my payment processor about network changes?
For most businesses: No notification required. You're upgrading infrastructure, not changing how payments are processed.
For businesses with PCI-validated QSA assessments: Inform your QSA (Qualified Security Assessor) that you've improved network segmentation with VLAN isolation. This may positively affect your compliance status.
For businesses with PA-DSS certified payment applications: Network changes don't affect PA-DSS certification, but document the improved isolation for your records.
What if I need more than 2-3 access points?
The configurations in this guide are starting points. Omada scales easily:
For larger deployments:
- Add higher-capacity PoE switch (16-port, 24-port, or 48-port)
- Purchase additional access points as needed
- Controller manages up to 100+ access points on free tier
- Consider OC200 hardware controller for better performance with 10+ devices
Coverage planning:
- Typical WiFi 6 AP covers 2,000-2,500 sq ft in office environment
- Adjust for construction (concrete walls reduce range significantly)
- High-density areas (conference rooms) may need dedicated AP
Is WiFi 7 worth the extra cost for small business?
Choose WiFi 7 (EAP773 @ ~$190/AP) if:
- Planning to keep system 5-7+ years
- Many newer devices (2024+ laptops, smartphones)
- Budget allows for future-proofing (~$1,045-1,225 total with 2.5G switch)
Choose WiFi 6 (EAP670 @ ~$150/AP) if:
- High-density deployment (open offices, busy retail)
- 4×4 MIMO provides better multi-client performance
- Most reliable option for business use (~$595-695 total)
Choose budget WiFi 7 (EAP723 @ ~$90/AP) if:
- Low-density areas (small shops, break rooms, waiting areas)
- Tight budget but want modern WiFi 7 standard
- Fewer than 20 simultaneous users per AP (~$475 total)
Real-world impact: For typical business usage (email, web browsing, video calls), WiFi 6 remains perfectly adequate through 2028-2029. WiFi 7 benefits primarily high-bandwidth applications (4K streaming, large file transfers).
Migration Summary
Consumer mesh systems are designed for residential environments with 30-50 devices. Business networks with 100+ active clients, payment terminals, and security compliance requirements exceed the design parameters of consumer hardware.
TP-Link Omada provides VLAN segmentation, centralized management, and professional features at competitive prices. The initial setup requires 2-4 hours and basic networking knowledge, but delivers operational stability and eliminates ongoing subscription fees.
Next Steps
1. Audit current device count:
- Count active connections during peak hours
- Document stability issues (reboot frequency, connection drops)
- Verify if current guest network meets security requirements
2. Select configuration:
- Best Value WiFi 6 (~$595-695) for high-density reliable networking
- Future-Proof WiFi 7 (~$1,045-1,225) for maximum performance and longevity
- Budget WiFi 7 (~$475) for low-density areas with modern standard
3. Plan installation:
- DIY if building has existing Ethernet runs to AP locations
- Professional installation ($1,000-1,800) if cabling required
- Schedule during maintenance window (before open/after close)
4. Order equipment:
- Verify shipping times (3-5 business days typical)
- Order OC200 hardware controller for business reliability
- Schedule consultation with our team for installation services
Related Guides:
- UniFi vs Omada WiFi 7 Business Comparison — Detailed platform comparison
- Guest WiFi with UniFi VLAN Setup — Similar guide for UniFi users
- Small Business Network Setup Guide — General networking principles
- Business WiFi Dead Zone Solutions — Coverage planning
- When to Stop DIY IT — Professional vs DIY decision guide
Affiliate Disclosure: This article contains affiliate links. If you make a purchase through these links, we may earn a small commission at no extra cost to you.
Related Articles
More from Network Infrastructure
Best Centrally Managed Network Systems 2026: UniFi, Cisco Meraki, Aruba & More
Complete comparison of centrally managed network platforms for small business. Covers UniFi, Cisco Meraki, Aruba Instant On, TP-Link Omada, Zyxel Nebula, and Firewalla with cost analysis and recommendations.
22 min read
Network Visibility: The Definitive Guide to Managed Infrastructure (2026)
Managed network infrastructure reduces troubleshooting time by up to 75% and cuts support costs by 50-70%. Complete 2026 comparison of managed vs unmanaged switches, UniFi switch selection, WiFi 7 backhaul requirements, and VLAN security.
12 min read
How Many UniFi Access Points, Switch Ports, and Cameras Do You Need? Our Sizing Rules
Sizing rules from 200+ UniFi installs: access points per square foot, switch port math, camera density, and NVR thresholds — plus a free configurator.
14 min read