How to Set Up Guest Wi-Fi the Right Way (And Why Most Businesses Get It Wrong)
Step-by-step guide to setting up a secure guest Wi-Fi network for your small business on UniFi or TP-Link Omada — without exposing your printers, payment terminals, or internal files.

When a customer asks for the Wi-Fi password, most business owners just give them the same one their accountant uses to sync QuickBooks.
This guide covers the security risk in plain language, then walks step-by-step through setup on both UniFi and TP-Link Omada — the two platforms we deploy most often for businesses across South Florida. By the end, your guests have internet access, your internal network has none of theirs, and the whole thing takes about 15 minutes.
Affiliate Disclosure: This article contains affiliate links. If you make a purchase through these links, we may earn a small commission at no extra cost to you.
TL;DR:
- Guest Wi-Fi puts visitors on a separate subnet — no access to your internal devices, printers, or payment terminals
- Both UniFi and Omada enable full traffic isolation with a single toggle — setup takes ~15 minutes
- Required equipment: routing gateway + PoE switch + Wi-Fi 7 access points
- Set guest bandwidth caps at 20–30% of your total ISP speed, not a flat number
Why Is Sharing Business Wi-Fi a Security Risk?
Sharing a primary business Wi-Fi network grants guest devices access to internal hardware, violating PCI compliance requirements and exposing your data to malware on unknown devices.
Your internal network is not just the internet. It is a shared workspace — and every device connected to it can potentially see and communicate with every other device on it. Your computers, your NAS drives, your printers, your security cameras, your point-of-sale terminal. When you hand a customer your main Wi-Fi password, you are placing a device you know nothing about into that workspace.
It may be a clean laptop. It may be a phone that picked up malware at the coffee shop across the street. Either way, once it connects to your main network, it is on the same subnet as your accounting software, your shared folders, and your payment infrastructure.
The analogy that clicks for most clients: your main Wi-Fi password is the front door key. It opens everything. A guest network is a separate entrance into a waiting room — comfortable, connected to the internet, completely cut off from the rest of the building.
The most common pushback we hear: "We do not have anything sensitive on our network." You have a printer. You likely have a NAS or a shared folder on someone's desktop. You have a router admin panel. You probably have a smart TV or a thermostat that has not been patched since 2022. Any of these are potential entry points once a foreign device is on the same network segment.
Payment Terminal Exposure
If you process card payments, your POS terminal lives on your network. PCI DSS compliance requires isolating payment systems from guest-accessible segments. A flat network that mixes customers and payment terminals is a compliance violation — not just a security risk. A guest network is one of the simplest ways to begin meeting that requirement.
What Does a Proper Guest Network Actually Do?
A proper guest network isolates visitor traffic onto a separate subnet, blocking all access to internal devices, printers, and payment terminals while maintaining full internet connectivity.
A correctly configured guest network does four things automatically:
- Isolates traffic. Guest devices are placed on a separate subnet with their own DHCP range. There is no routing path between the guest network and your internal LAN.
- Blocks device visibility. Client isolation ensures guests cannot see or communicate with anything on your internal network — printers, NAS drives, other staff devices — or with other guests' devices.
- Uses a separate SSID. Your business Wi-Fi and your guest Wi-Fi are completely distinct networks with different names and passwords. Changing the guest password does not affect your internal credentials or any connected business devices.
- Allows bandwidth control. You can set per-network download and upload limits so a guest streaming video cannot saturate the connection you need for a Zoom call.
Both UniFi and Omada handle the underlying firewall rules automatically when you enable the guest toggle. You do not write firewall policies or configure VLANs by hand — the platform does it. You fill in the fields and click save.
If You Have an ISP-Provided Modem/Router
Most AT&T, Comcast, and Spectrum business gateways combine a modem and router in one unit. If you add a UniFi or Omada gateway behind it without changes, you end up with two routers on the same network — a configuration called "double NAT" that causes problems. Put your ISP gateway into Bridge Mode (or "IP Passthrough") so it acts as a pure modem and hands the public IP directly to your new gateway. Your ISP's support line can walk you through this for your specific model.
How to Configure Guest Wi-Fi on UniFi Networks
When you mark a network as "Guest" in the UniFi controller, client isolation and LAN-blocking firewall rules are applied automatically. For most small businesses, that is all the configuration you need.
UniFi Network Introduction
Prerequisites: Any UniFi gateway running UniFi OS — the Cloud Gateway Max, Cloud Gateway Ultra, Dream Router 7, or any Dream Machine. Your access points connect to the gateway and inherit the guest network configuration automatically.
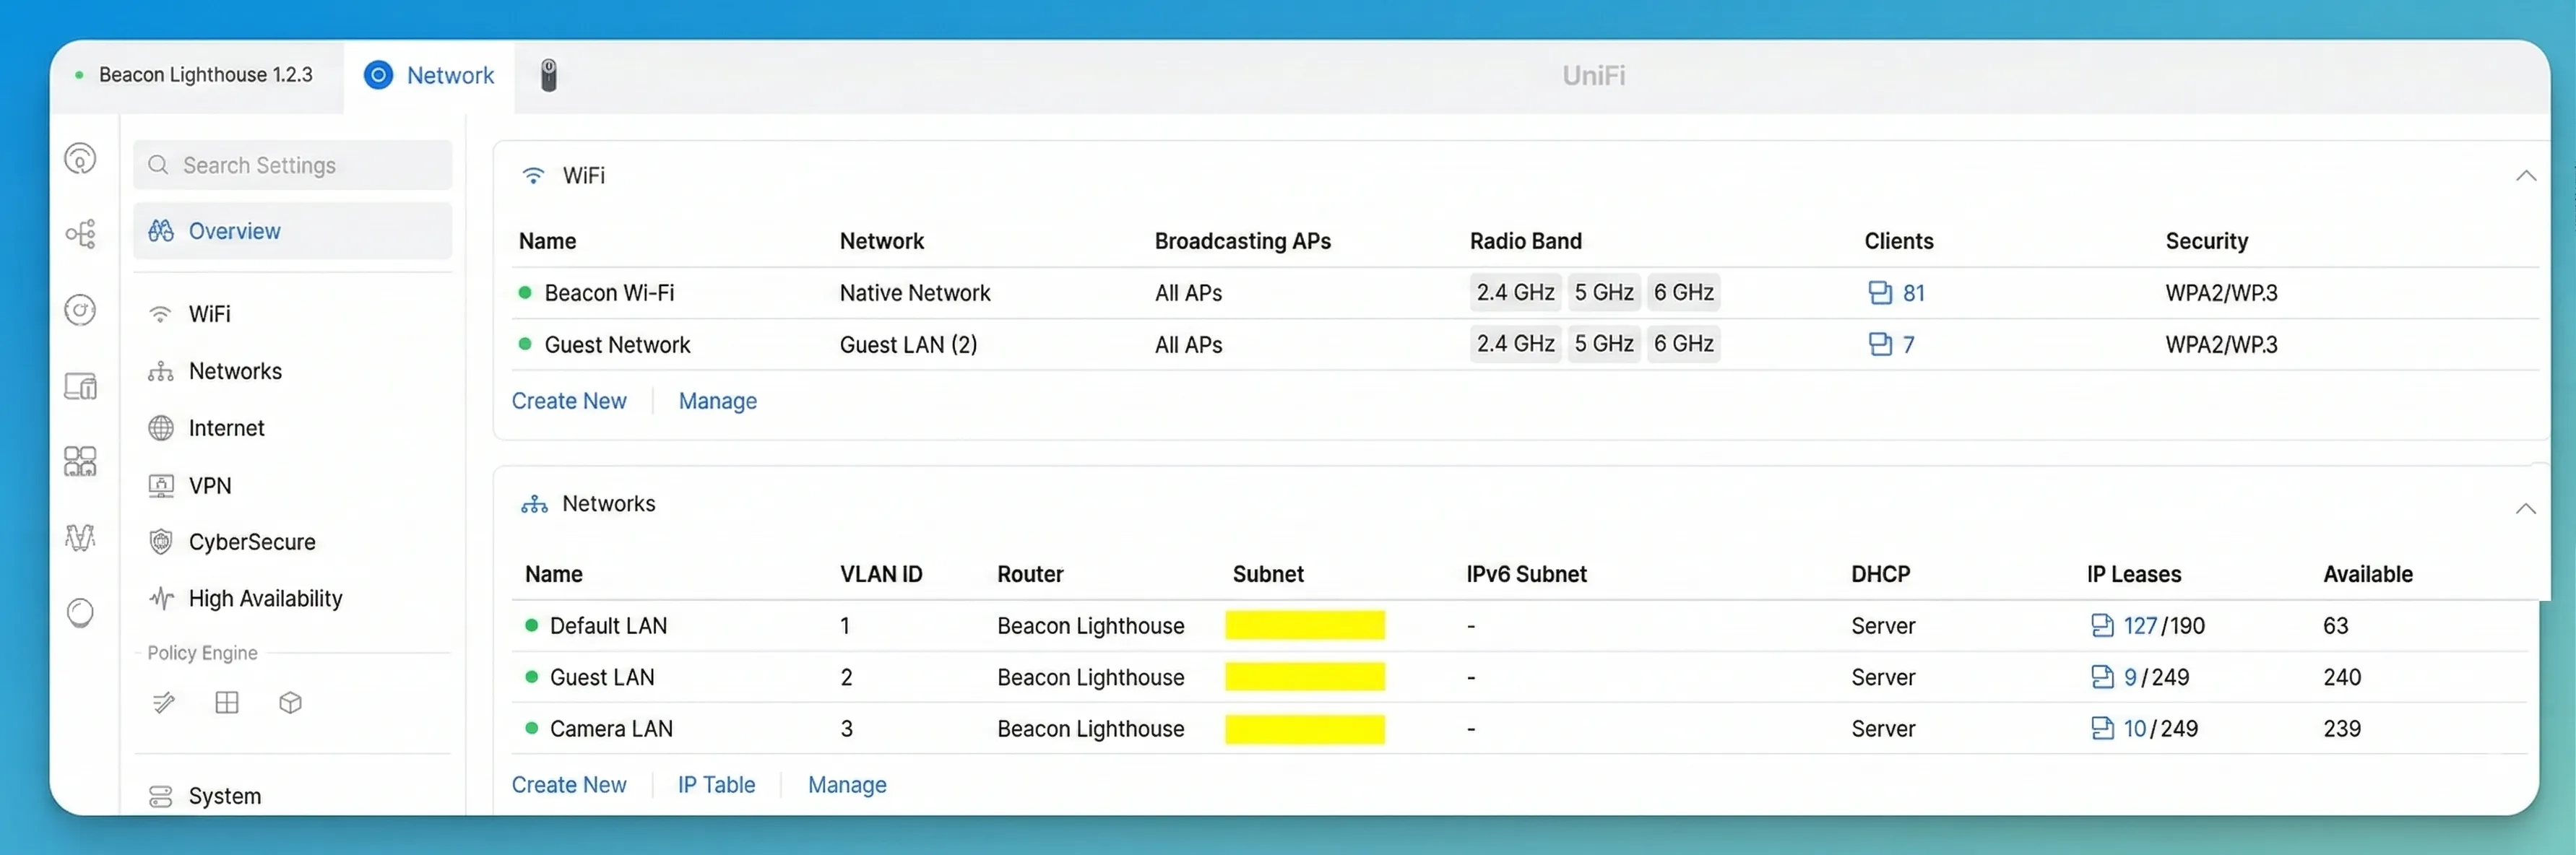
Step 1: Create the Guest Network
- Open your UniFi controller at unifi.ui.com or your local controller IP address.
- Navigate to Settings → Networks.
- Click Create New Network.
- Name it something descriptive — "Guest" works; the customer-visible Wi-Fi name is set separately in Step 2.
- Assign a VLAN ID (e.g., 40) to place guest traffic on a dedicated network segment, fully separate from your staff devices.
- Set the Zone to Hotspot. This is the critical setting: the Hotspot zone automatically blocks this VLAN from reaching all internal networks and unlocks captive portal support if you need it later. If you prefer to configure isolation manually, enable the Network Isolation toggle instead — it creates the same inter-VLAN firewall rules without the portal features.
- Leave DHCP settings at default and DNS on auto.
- Click Add Network.
Step 2: Create the Guest Wi-Fi SSID
- Go to Settings → WiFi.
- Click Create New WiFi Network.
- Set the Wi-Fi Name (SSID) to whatever guests will see — "YourBusiness-Guest" is readable and professional.
- Set a password. Make it strong but typeable: something like
Maple2026!works better than a random 20-character string guests have to squint at. - Under Security, choose WPA2/WPA3 (Transition Mode). Avoid pure WPA3-only — older Android tablets, cheap laptops, and some IoT devices cannot connect to WPA3-only networks, which creates front-desk headaches with no security benefit for a guest network.
- Under Network, select the Guest VLAN you created in Step 1.
- Enable Client Device Isolation. This prevents guests connected to different access points from communicating with each other — the WiFi-level complement to the network-level isolation applied by the Hotspot zone in Step 1.
- Enable Proxy ARP. This allows the access point to proxy DHCP and multicast traffic on behalf of guest devices, significantly reducing broadcast congestion on the wireless medium. In high-traffic environments — a waiting room, a café — this noticeably improves performance for every connected guest.
- Optionally expand Advanced settings to set bandwidth limits. Cap guest bandwidth at 20–30% of your total ISP speed — on a 200 Mbps line that is 40–60 Mbps down for guests; on a 100 Mbps line, 20–25 Mbps. This ensures your POS system and staff video calls are never affected by guest traffic.
- Click Add WiFi Network.
The SSID will broadcast across your access points within a minute or two. Test it: connect a phone to the guest network and open the browser. First, confirm you can reach the internet normally. Then, type the IP address of your router or an internal device — such as 192.168.1.1, a network printer address, or your NAS — directly into the address bar. If the page times out or refuses to connect, guest isolation is working correctly.
Share the password without telling anyone: generate a Wi-Fi QR code and print it for your counter or table tent. Guests scan it with their phone camera and connect immediately — no password to read, type, or share verbally. For generation, use a local or offline tool: the UniFi app generates Wi-Fi QR codes natively from the network detail screen; iOS Shortcuts and Android Settings → Wi-Fi → Share both produce scannable codes on-device. Avoid random "free QR code generator" websites — many of the top search results in 2026 inject redirect tracking links or ads between the scan and the connection, which defeats the simplicity entirely.
Need Full VLAN Segmentation?
The setup above handles guest isolation completely for most small businesses. If you run a more complex network — multiple departments, contractor access tiers, IoT device isolation — start with our VLANs explained guide to understand which segments you need, then follow our UniFi VLAN setup guide for the full technical configuration with firewall rules.
For complete isolation at every network layer, UniFi also supports enabling Device Isolation (ACL) on the switch port profiles assigned to your guest VLAN. This adds ACL-level enforcement at the switch hardware, on top of the Hotspot zone and Client Device Isolation set above. Most Wi-Fi-only guest networks do not need this — it is most relevant when you have wired guest ports in a conference room or lobby.
Already running UniFi and ready to shop? The Cloud Gateway Max ($279) is our recommended gateway, paired with the U7 Pro ($189) for most office sizes.
How to Configure Guest Wi-Fi on TP-Link Omada
The Omada controller delivers the same subnet isolation as UniFi, but requires one additional step: creating a dedicated LAN before assigning it to the SSID. Skipping this leaves guests drawing IP addresses from your primary business DHCP pool — sharing address space with your POS terminals and staff computers.
Prerequisites: An Omada gateway (ER707-M2 or ER7206 for most small businesses), EAP-series access points, and an Omada controller — either the OC300 hardware controller or the free cloud-based option at omada.tplinkcloud.com. Open the controller at your local OC300 IP address or sign in at omada.tplinkcloud.com, and select your site.
Step 1: Create the Guest LAN (VLAN)
This is the step most tutorials skip, and it is the most consequential one. Without a dedicated LAN, your guest SSID draws from the same IP pool as your staff machines — enabling DHCP exhaustion and leaving the foundation for true subnet isolation incomplete.
- Navigate to Settings → Wired Networks → LAN.
- Click Create New LAN.
- Name it clearly — "Guest" or "Guest-VLAN".
- Assign a VLAN ID (e.g., 20) — use a number that does not conflict with any existing VLAN in your deployment.
- Set a dedicated IP subnet for guests — for example,
192.168.20.1as the gateway with a/24subnet. This creates an entirely separate address pool from your staff network (typically on192.168.1.x), so guest DHCP leases never compete with your business devices. - Leave DNS on auto; your gateway handles forwarding.
- Click Save.
Step 2: Create the Guest Wireless Network
- Go to Settings → Wireless Networks → WLAN.
- Click Add.
- Enter your SSID — "YourBusiness-Guest" or whatever branding fits your location.
- Set Security to WPA2/WPA3 (Transition Mode, not WPA3-only) and assign a password. Transition mode allows both modern WPA3 and legacy WPA2 devices to connect — essential for a public-facing guest network.
- Scroll to the Guest Network section and toggle it On. In Omada, this toggle deploys background ACLs (Access Control Lists) that automatically block wireless clients from reaching any private IP range (10.x.x.x, 172.16.x.x, 192.168.x.x) — a second layer of protection for your internal hardware on top of the VLAN you created in Step 1.
- Expand Advanced Settings and set the VLAN ID to match the Guest LAN from Step 1 (e.g., 20). This is the assignment that places guest devices on the separate subnet — the Guest Network toggle and the VLAN ID work together. Without the VLAN ID here, the ACLs protect against LAN access but guests remain on your main subnet.
- Under Rate Limit, enable bandwidth control. Cap guest bandwidth at 20–30% of your total ISP speed — on a 200 Mbps line, allow 40–60 Mbps down for guests; on a 100 Mbps line, keep it at 20–25 Mbps.
- Click Apply.
Step 3: Confirm Access Points Are Broadcasting
In the Omada controller, go to Devices and verify your access points show the new SSID as active. Propagation typically takes 30–60 seconds. Test with a phone: connect to the guest SSID and confirm internet access works normally. Then open the browser and type your router's IP address (usually 192.168.1.1 or your ER707-M2's LAN IP) or the address of an internal device like a printer. If it times out or refuses to load, isolation is confirmed. As a final check, verify your phone received an IP address in the guest subnet range (e.g., 192.168.20.x) — not your main business range — confirming the VLAN assignment is working.
Omada Without a Hardware Controller
If you have a single Omada access point, you can enable guest network features directly from the Omada app in standalone mode — no controller hardware required. The free Omada cloud management platform works the same way with no monthly fees. The OC300 hardware controller becomes the right choice once you have multiple APs, switches, and gateways to manage from one dashboard.
Going with Omada? The EAP772 ($170) is our recommended Wi-Fi 7 access point, and the ER707-M2 ($120) covers routing for most small offices.
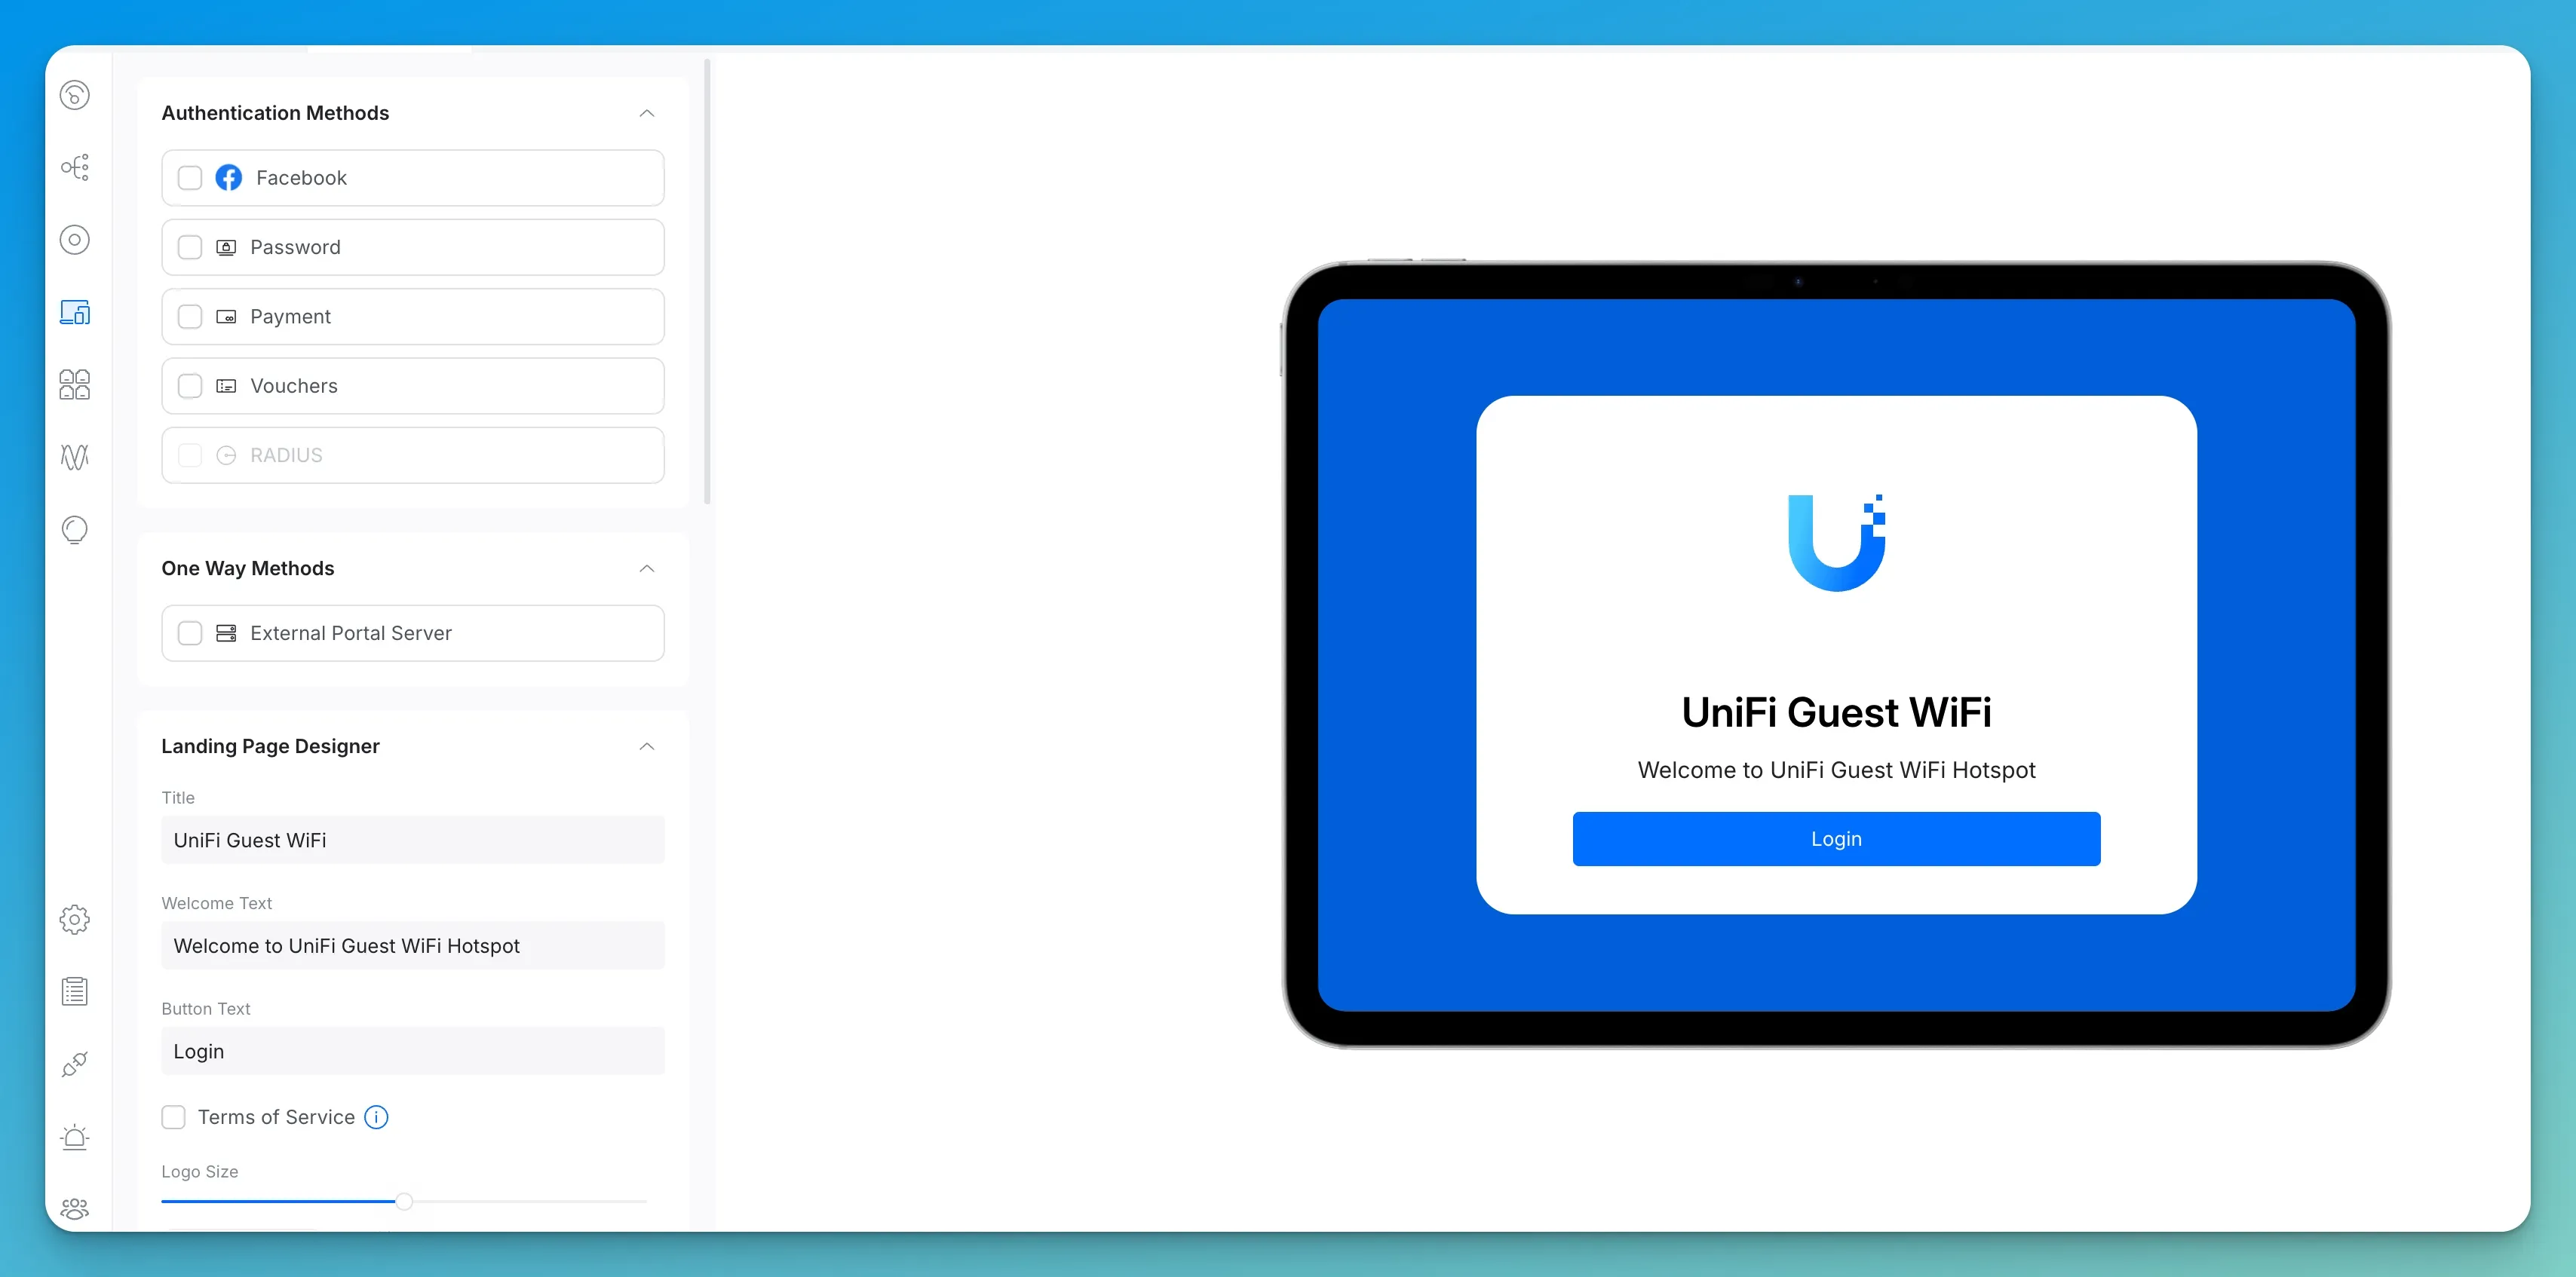
Should You Add a Captive Portal?
A captive portal requires guests to accept an Acceptable Use Policy before accessing the internet, protecting your business from liability for illegal activity conducted over your network.
Many businesses skip this step, particularly in retail, hospitality, co-working spaces, and medical waiting rooms where guest volume is high and turnover is constant. Without a captive portal, your business IP address is on record for any activity a guest conducts over your connection. A click-through AUP creates a legal acknowledgment of acceptable use before granting access.
Both platforms support this natively with no additional hardware:
- UniFi: In your guest network settings, navigate to Guest Portal and enable it. Add your AUP text or upload a custom splash screen. UniFi also supports voucher-based login for time-limited guest access.
- Omada: Under Settings → Authentication, select your guest wireless network and enable Portal. Omada supports click-through agreements, voucher codes, and social login options.
What to put in your AUP: Most business owners stall here because they do not know what to write. A three-sentence boilerplate covers the essentials:
"By connecting to this Wi-Fi network, you agree to use it for lawful purposes only. Illegal activity, including unauthorized access to computer systems, copyright infringement, and distribution of malicious software, is strictly prohibited. The network operator reserves the right to terminate access at any time without notice."
Paste that, add your business name, and you are done. For regulated industries (healthcare, legal), consult your compliance officer before modifying it.
If your business has returning guests — a gym, co-working space, or regular lunch crowd — set the portal to remember devices for 7 to 30 days. Once a device has accepted the AUP, it is not forced to re-acknowledge on every visit. On UniFi, this is the Authorization Expiry field in the guest portal settings. On Omada, it is the Authentication Validity period under Portal configuration. Forcing regulars through the consent screen every single day creates unnecessary friction without meaningfully improving your legal position.
A note on MAC address randomization: iPhones (iOS 14+) and modern Android phones use a randomized MAC address by default on every new network. This means a returning guest device may present a different hardware identifier than it did on a previous visit, causing the portal to prompt for re-acceptance even within your authorization window. This is normal OS behavior — not a network misconfiguration. Guests can disable MAC randomization for your specific network in their device Wi-Fi settings (iOS: tap the network name → Private Wi-Fi Address → Off; Android: tap the network → Privacy → Use device MAC). For most business guest networks, just setting a reasonable authorization window and explaining this to frequent visitors is sufficient.
Adding a captive portal takes about two minutes alongside the setup above. For any business with regular guest traffic, it is a practical addition worth enabling.
High-Traffic Venues: Reduce Your DHCP Lease Time
If your location sees 100 or more guest connections per day — a café, a waiting room, a co-working space — your router can run out of IP addresses to hand out, a problem called DHCP pool exhaustion. The default 24-hour lease means an address stays reserved all day even after the guest has left. Reduce the DHCP Lease Time on your guest network to 2 hours, or expand the guest subnet to a /23 (512 available addresses instead of 254). Both settings are in the network's IP configuration inside your UniFi or Omada controller.
Should You Enable Content Filtering on the Guest Network?
Content filtering on the guest network protects your business IP reputation, reduces legal exposure, and blocks the majority of malware before it reaches guest devices — at no additional cost on either platform.
Without filtering, your business IP address is the one flagged if a guest streams pirated content or visits known malware distribution sites. Both platforms offer this at the network level with no additional hardware:
- UniFi: Under Settings → Traffic Management, enable Content Filtering on the guest network — UniFi's native filter blocks adult content, malware, and ad trackers. Ubiquiti's own best practices also recommend using Traffic Management to block the File Transfers application category, which prevents BitTorrent clients and large peer-to-peer transfers from saturating your connection regardless of which DNS resolver guests use. For additional DNS-level coverage, point the guest network DNS to NextDNS or AdGuard DNS — both are free for light usage and block thousands of malicious domains by default.
- Omada: Under Settings → Network Security, enable DNS Filter for the guest wireless network. Select a filter profile (Adult Content, Malware, or Custom) to match your requirements.
This takes under a minute to configure and runs silently. Most businesses enable the malware-only profile at minimum — it costs nothing and meaningfully reduces the odds of a guest device using your connection to reach a command-and-control server.
Why IoT Devices Don't Belong on Your Guest Network
Client isolation — the feature that makes a guest network secure — also blocks devices on that same network from communicating with each other. Smart TVs cannot receive casts. Wireless speakers lose app control. Network printers become unreachable. This is by design, and it is the correct behavior.
A common mistake we see regularly: a business adds smart TVs, a Sonos system, or a shared printer to the guest network to "keep it off the main network." The intent is sound. The execution breaks those devices — and can gradually compromise guest isolation as workarounds are added.
IoT devices need their own dedicated VLAN — completely separate from both your staff network and your guest network. That VLAN gives smart devices internet access and the ability to communicate with each other (so casting and printing work), while keeping them isolated from everything else. Your guest network stays locked down. Your staff network stays clean. Your smart devices keep working.
Setting up a dedicated IoT VLAN on UniFi follows the same process as guest network creation — create a second isolated network and assign your smart devices to it. The UniFi VLAN guide covers the full configuration.
What Equipment Do You Need for a Business Guest Network?
A secure business guest network requires three components: a routing gateway, a PoE switch to power access points, and dedicated Wi-Fi 7 access points — all centrally managed with no per-device subscription fees.
Consumer routers from your ISP often have a "guest network" toggle, but the isolation is software-only and frequently incomplete. The guest network may share a subnet with your main network, or the firewall rules may not block all inter-device communication reliably. For a business that handles customer data or processes payments, that is not an acceptable baseline. With UniFi and Omada, all three components are managed from a single dashboard.
UniFi: Our Standard Recommendation
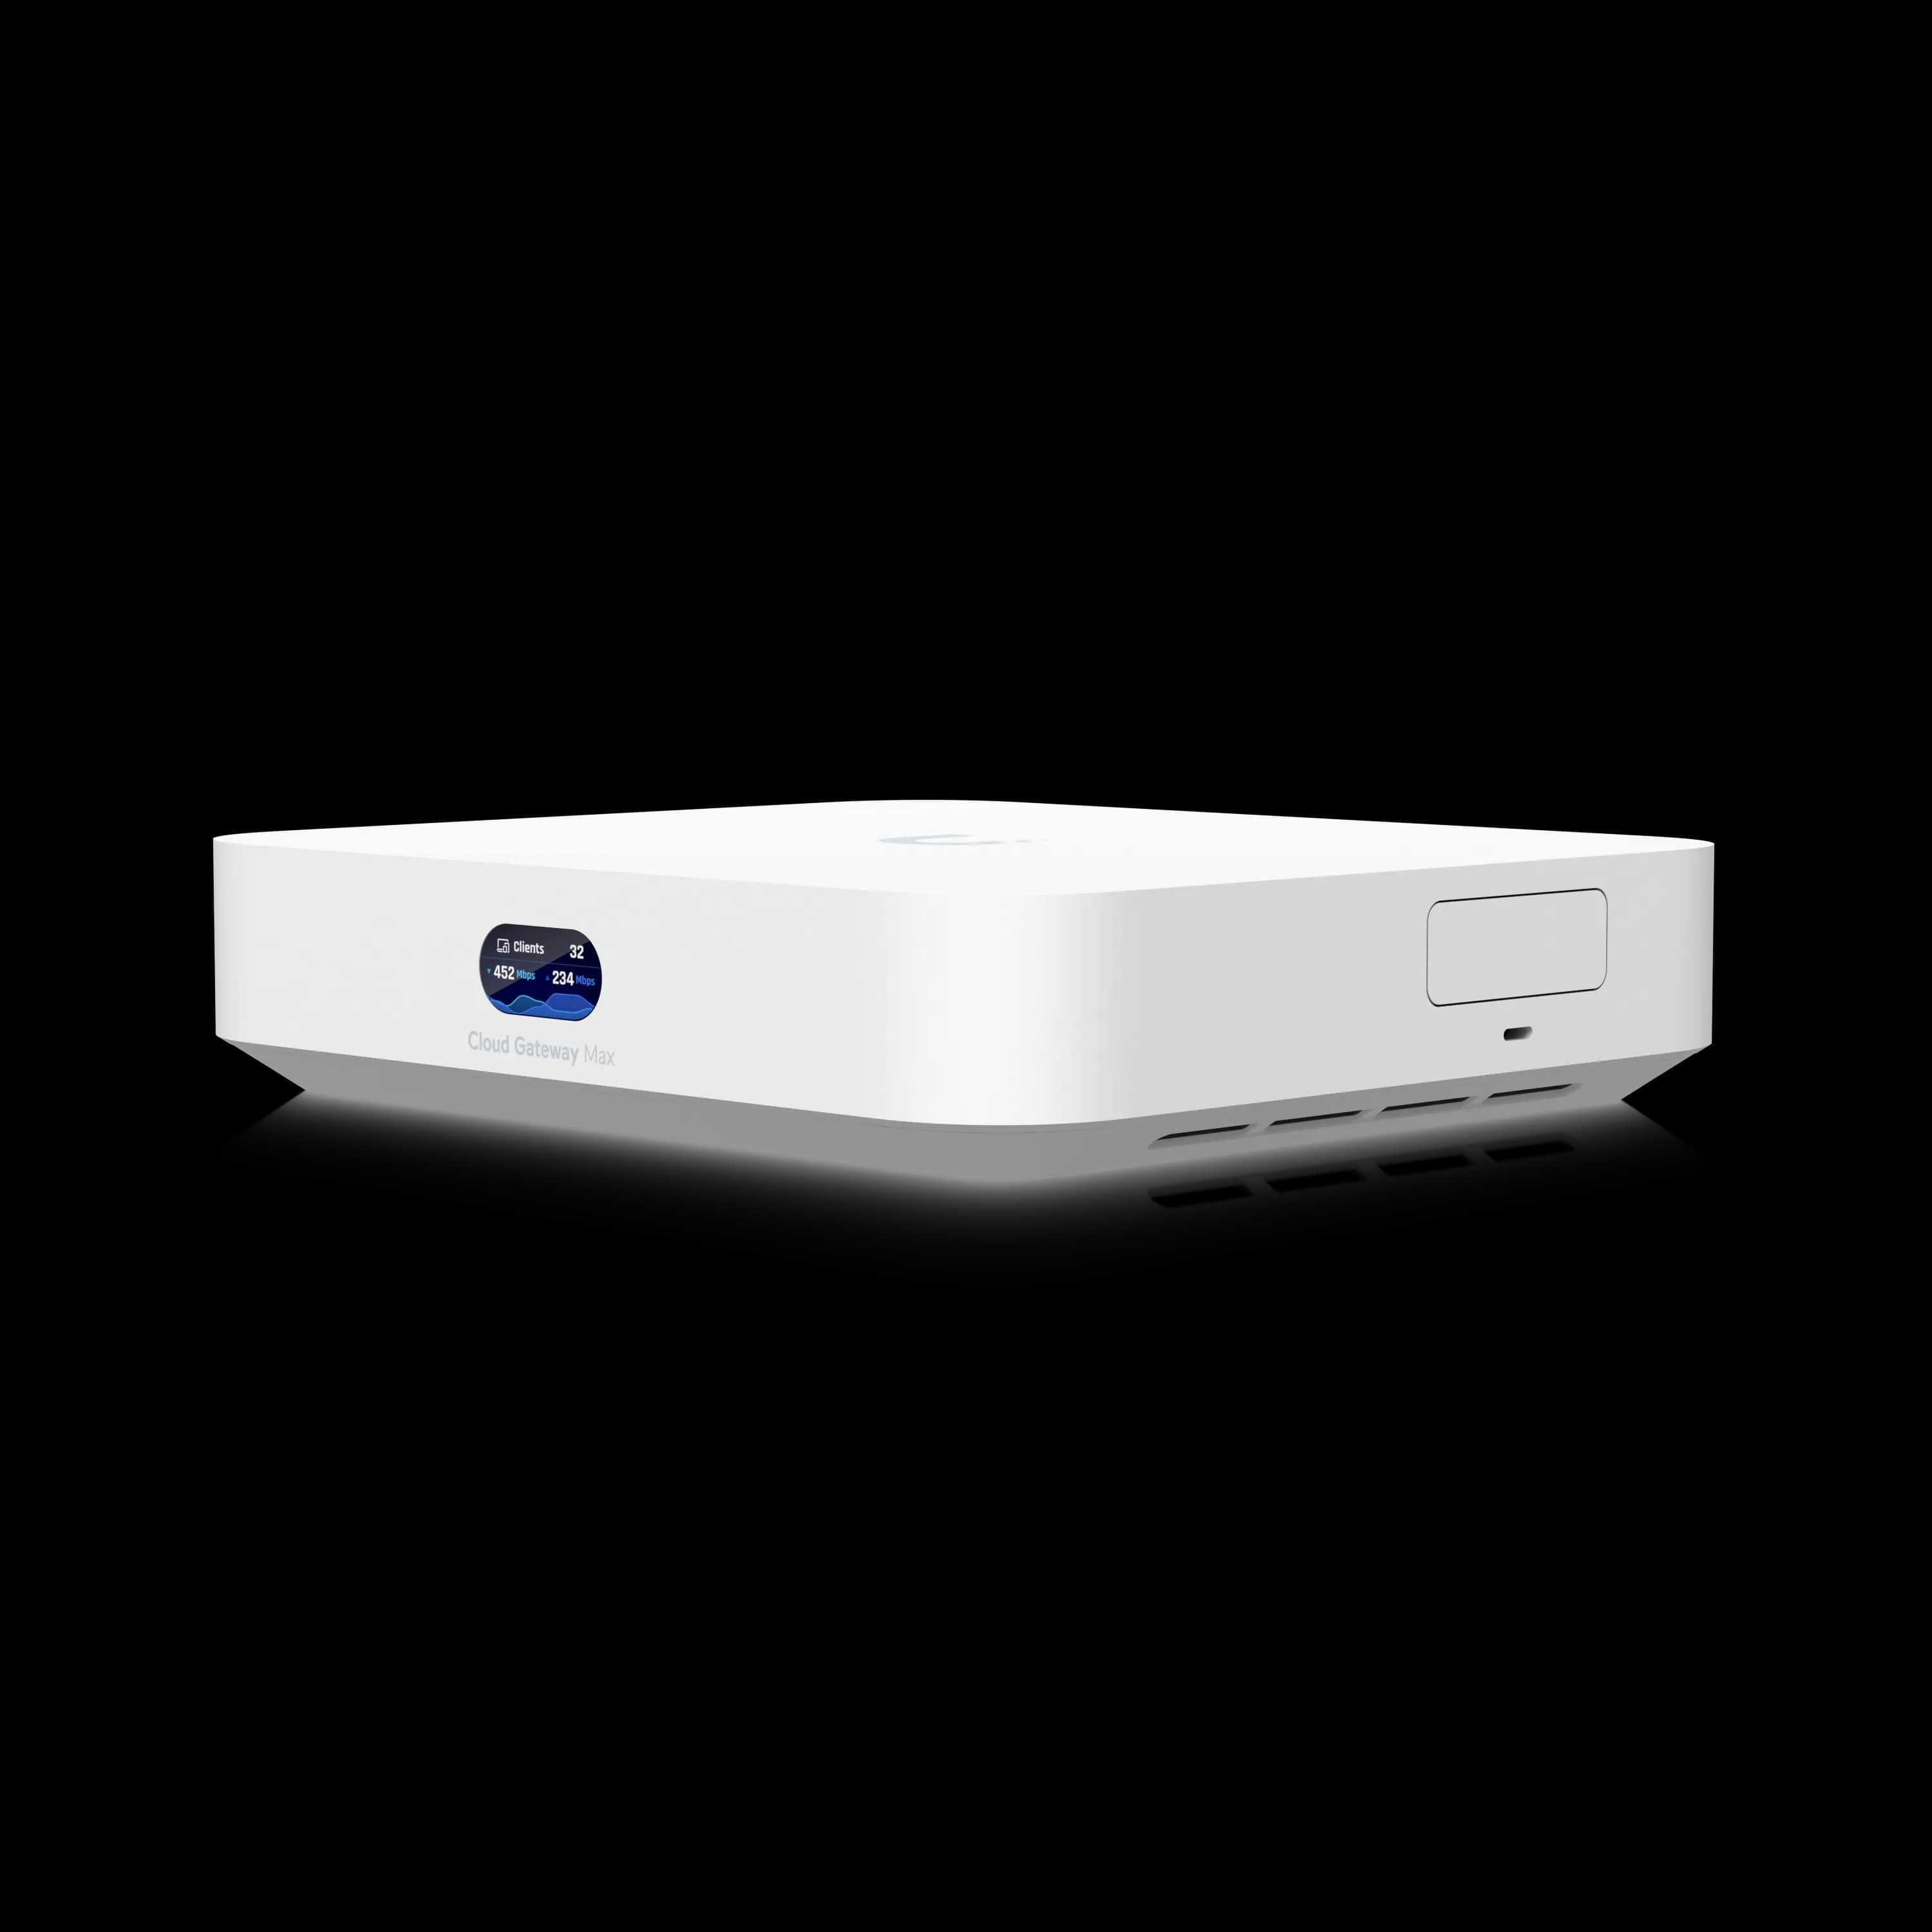
UniFi Cloud Gateway Max
Compact gateway with 2.3 Gbps IPS routing, five 2.5 GbE ports (4 LAN + 1 WAN), and NVR support (add-on SSD required). Runs the full UniFi application suite with no subscription.
- 2.3 Gbps IPS/IDS throughput
- 30+ device / 300+ client support
- NVR-ready (add-on SSD for storage)
- Fanless, silent operation
*Price at time of publishing
For access points, the U7 Pro ($189) covers most single-floor offices under 1,500 sq ft — Wi-Fi 7 with 6 GHz support, 300+ client capacity, and a 2.5 GbE uplink. High-density environments with 100+ simultaneous devices benefit from the U7 Pro Max ($279), which adds 4×4 MIMO on 5 GHz and a built-in spectral scanning radio. For the switch, the Lite 8 PoE ($109) is the right choice for most small offices — four PoE+ ports, plenty for two or three access points, with room left for wired workstations. If you need eight full PoE+ ports or 10G SFP+ uplinks, the USW Pro 8 PoE ($349) is the step-up option.
Omada: Best-Value Alternative
Omada EAP772 Wi-Fi 7 Access Point
~$170Tri-band Wi-Fi 7 access point with 6 GHz support, 2.5 GbE uplink, and Omada SDN integration. No subscription required.
The EAP772 pairs well with the ER707-M2 gateway ($120) — dual 2.5 GbE ports, multi-WAN failover, and full Omada SDN management. Add the SG2210MP PoE switch (~$240) to power your access points — a managed Omada-compatible switch that handles VLAN tagging and PoE scheduling from the same controller dashboard. Manage everything through the OC300 hardware controller ($160) once your network grows beyond two or three devices. For businesses weighing the two ecosystems, our UniFi vs Omada comparison covers both platforms side by side.
Which Platform Should You Choose?
Choose UniFi if you value the most polished management interface, plan to add security cameras (built-in NVR support), or your IT provider already manages UniFi networks. Choose Omada if upfront cost is the priority — you can build a comparable guest network setup for roughly 30% less. Both platforms provide real network isolation, central management, and no monthly fees.
Frequently Asked Questions
Can guests on my Wi-Fi see other guests' devices?
On a properly configured guest network with client isolation enabled — no. Guest devices cannot see each other and cannot see anything on your internal business network. UniFi and Omada both enable client isolation automatically when you toggle the guest network setting. There is no separate configuration step required.
How do I share the guest password without printing it on the wall?
Generate a Wi-Fi QR code at any free Wi-Fi QR code generator — search "Wi-Fi QR code generator," enter your SSID and password, and download the result. Print it on a small card and put it at your counter or front desk. iOS and Android cameras read Wi-Fi QR codes natively. Guests point their camera at it and connect immediately with no typing. When you change the password, you generate a new QR and reprint the card. This is how most of our clients handle it — it takes two minutes to set up and eliminates every "what was the password again?" conversation.
Should I set bandwidth limits on the guest network?
Yes. Without caps, a single guest streaming 4K video or running a large upload can degrade your POS system or staff calls. Cap total guest bandwidth at 20–30% of your ISP speed: on a 200 Mbps line, allow 40–60 Mbps for guests; on a 100 Mbps line, keep it at 20–25 Mbps. Avoid a flat number — on a slower connection a hard 25 Mbps cap leaves nothing for your business traffic, and on a 500 Mbps line it is unnecessarily restrictive. Both UniFi and Omada apply this as a per-network rate limit.
The Bottom Line
You started with a customer asking for the Wi-Fi password. The right answer is to give them a separate guest network name and a password that grants internet access and nothing else — not the same credentials your team uses for everything.
On both UniFi and Omada, the setup takes 15 minutes and requires nothing more than navigating to the right settings page and enabling a toggle. The protection is immediate and permanent: every future customer, contractor, or vendor who connects is automatically isolated from your internal systems, your files, and your payment infrastructure.
That is not a feature reserved for enterprise networks. It is the correct default for any business that has a physical location and a Wi-Fi router.
Related Resources
- How to Build a Reliable Guest WiFi Network with UniFi VLANs — The technical deep-dive for UniFi users who want full VLAN segmentation, custom firewall rules, and multi-network isolation.
- UniFi vs Omada for Small Business Wi-Fi 7 — Side-by-side platform comparison if you are still deciding which ecosystem fits your business and budget.
- Small Business Network Security Audit Guide — A full audit checklist covering firewall rules, password hygiene, device inventory, and the other areas most small businesses overlook.
Related Articles
More from Network Infrastructure
How to Build a Reliable Guest WiFi Network for Your Business (UniFi + VLAN Setup)
Learn how to set up a secure guest WiFi network with UniFi VLANs. Step-by-step guide for small businesses covering network isolation, captive portals, and security best practices.
20 min read
Dual WAN for Business: Why One Internet Connection Isn't Enough
Why a single ISP is a single point of failure, how to verify real route diversity, and which dual-WAN gateway and backup connection fit a rack network or a simple branch office.
19 min read
How Often Should You Replace Your Router? The Security Signs We Look For on Every Job
Forget the 'every 3–5 years' rule. Here's the field checklist we run on a client's router before replacing it — plus what 4 years of fleet data says about how long networking gear actually lasts.
11 min read