Your Employee Just Clicked a Phishing Link. What Do You Do in the Next Hour?
Your employee clicked a phishing link. Follow these 6 steps in the next 60 minutes to contain the threat, protect your data, and prevent the incident from escalating into a full breach.

Affiliate Disclosure: This article contains affiliate links. If you make a purchase through these links, we may earn a small commission at no extra cost to you.
Your employee just called you: "I think I clicked something I shouldn't have." Here's what to do in the next 60 minutes—and what not to do.
This guide walks you through the critical steps to take immediately after an employee clicks a phishing link. It's written for business owners and managers who need to act fast, not IT teams with advanced security tools.
Active Incident Quick Response
If this is happening right now, take these actions immediately:
- Instruct the employee to stop — Keep the browser open, don't enter additional information, don't restart the computer
- Capture screenshots — Document the URL bar, page content, and any download prompts
- Disconnect from the network — Unplug ethernet or disable Wi-Fi (keep the machine powered on)
- Contact your IT provider or security team — If unavailable, continue with the detailed steps below
Phishing attacks affect organizations of all sizes and sophistication levels. AI-generated phishing emails achieve a 54-60% click-through rate (Hunto AI, 2026), and attacks now occur every 19 seconds (Cofense, 2025). While the average business takes 241 days to identify and contain a compromise (IBM Cost of a Data Breach Report, 2025), the first hour after a click is critical for containment.
Understanding What Actually Happened: Click vs. Credential Harvest vs. Download
Not all phishing clicks are equal. The severity and response steps depend on what happened after the click.
| Scenario | What Happened | Risk Level | Priority Actions |
|---|---|---|---|
| Just Clicked the Link | Employee clicked but didn't enter information or download anything | ⚠️ Low-Medium | Screenshot evidence, disconnect, scan for malware |
| Entered Credentials | Employee typed username/password on a fake login page | 🔴 High | All of the above + immediate password changes, enable MFA, check login history |
| Downloaded a File | Employee clicked "Download" or "Run" on an attachment | 🔴 Critical | All of the above + assume malware infection, consider professional help |
| Executed Downloaded File | Employee opened/ran the downloaded file | 🔴 Severe | Immediate professional help—potential ransomware or RAT infection |
Key insight: Clicking a link alone may only load a webpage. Entering credentials gives attackers access to your accounts. Downloading and running a file can install ransomware, keyloggers, or remote access trojans. Each escalation requires a more comprehensive response. If the employee was specifically tricked into pasting a command into PowerShell or the Run dialog (a technique known as ClickFix), see our ClickFix and copy-paste attack guide for the specific incident response steps for that attack pattern.
If you're unsure which scenario applies, follow all the steps below to ensure thorough containment.
Step 1: Preserve Evidence Before Taking Any Action
Capture screenshots of the URL bar, the full page, and any download prompts before taking any other action. This evidence is critical for forensic analysis, insurance claims, and law enforcement reporting.
What to capture:
- The full URL in the address bar — This shows where the phishing site is hosted
- The entire page — Including any forms, buttons, or text
- Any download prompts or pop-ups — These indicate whether malware tried to install
- The original email — If it's still open, screenshot the sender address and email content
How to take screenshots:
- Windows: Press
Windows + Shift + Sto capture a region, orWindows + PrtScnfor the full screen - Mac: Press
Command + Shift + 4to select an area, orCommand + Shift + 3for the full screen - iPhone: Press
Side Button + Volume Upsimultaneously (orHome + Poweron older models) - Android: Press
Power + Volume Downsimultaneously (varies by manufacturer) - Save these images to a USB drive, cloud storage, or email them to yourself from a different device—not on the potentially compromised device
Why this matters: If the attack escalates, you'll need this evidence for forensic analysis, insurance claims, or law enforcement reporting. Phishing sites are often taken down within hours, making immediate capture essential.
After capturing evidence: Once screenshots are saved, you can close the browser tab. If the employee entered credentials on the phishing site, clear the browser's cache, cookies, and saved passwords after you've completed Step 3 (password changes). This removes any session tokens or credentials that may have been stored locally.
What to avoid: Avoid closing the browser tab before capturing evidence. Avoid clicking additional links or buttons on the page, as this may trigger further malware downloads.
Step 2: Disconnect the Computer from Your Network
Immediately sever network access by unplugging the ethernet cable or turning off Wi-Fi to stop malware from spreading. Keep the machine powered on to preserve RAM for forensic analysis.
How to disconnect:
Desktop/Laptop:
- If using Wi-Fi: Turn off Wi-Fi on the computer (don't just disconnect from the network—turn the Wi-Fi adapter off completely)
- If using ethernet: Unplug the cable from the computer
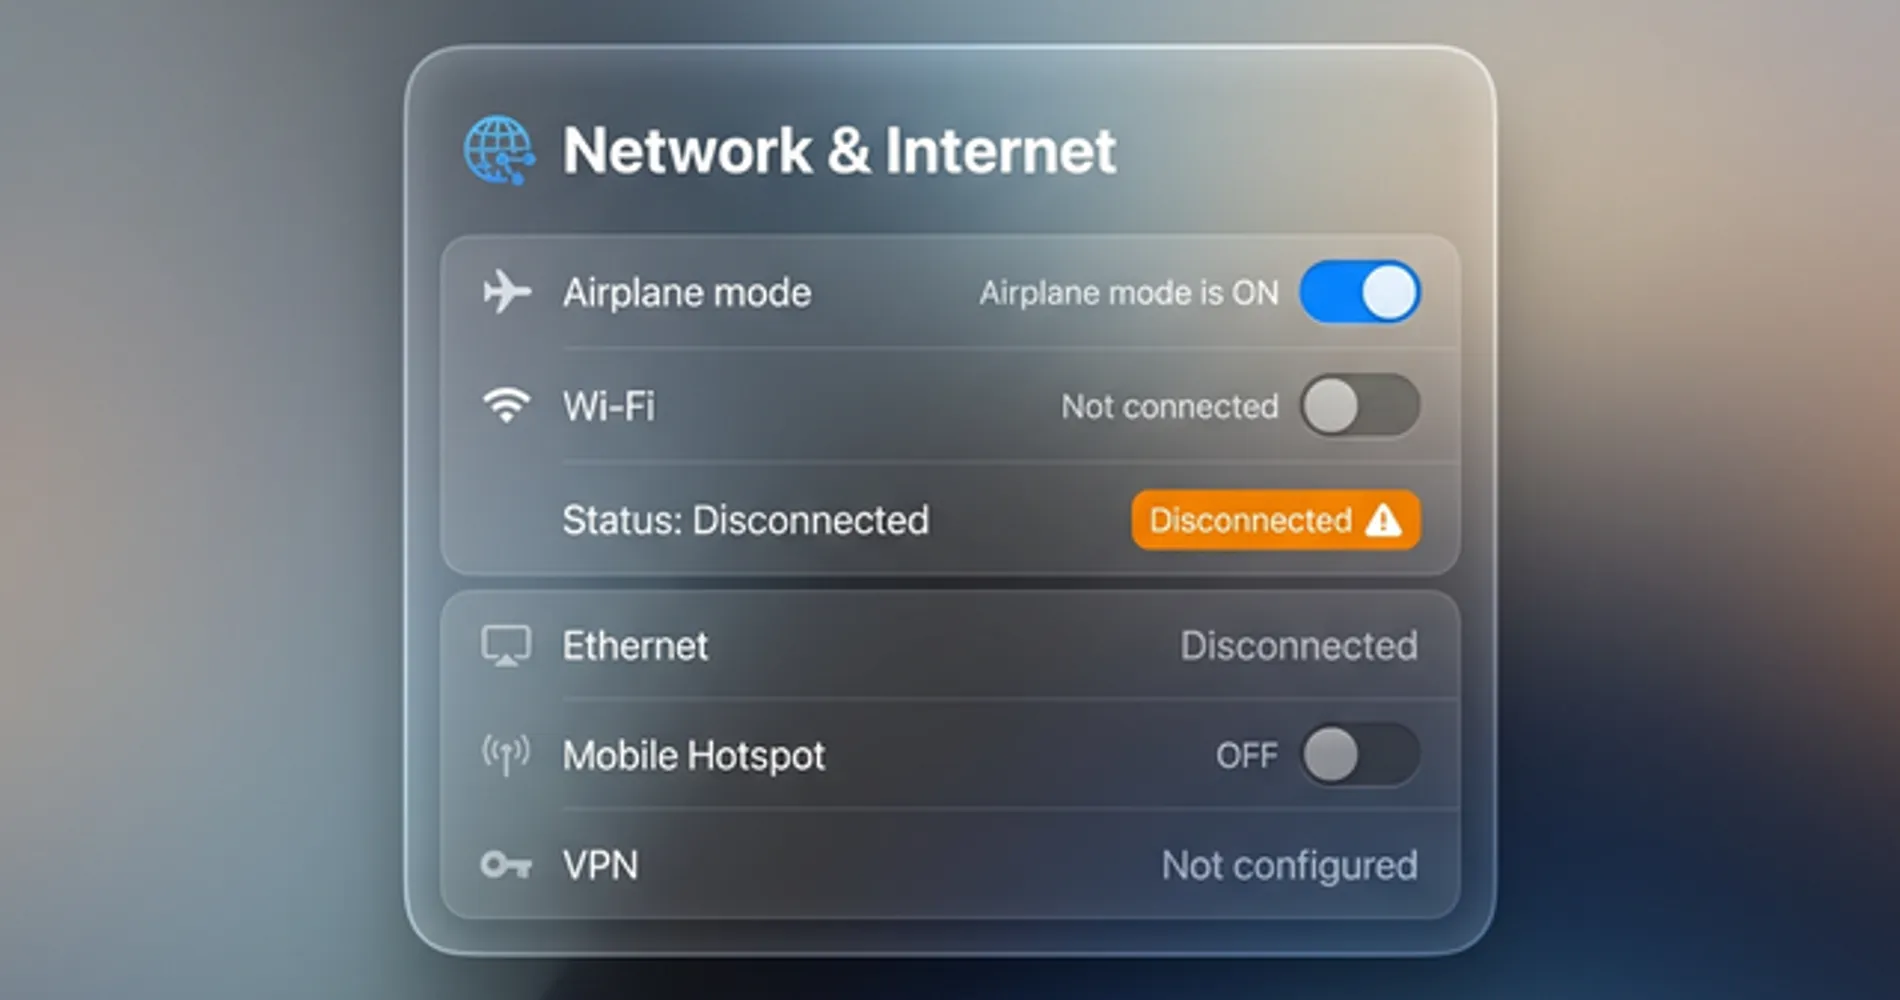
- If on a laptop: Enable airplane mode as an extra precaution
Mobile Devices (iPhone/Android):
- Enable Airplane Mode immediately — Swipe down (Android) or up (iPhone) to access Quick Settings and tap the airplane icon
- Critical: Do NOT simply switch from Wi-Fi to cellular data. Airplane mode disables all network connections (Wi-Fi, cellular, Bluetooth)
- Keep the device powered ON — Do not restart or power off the phone
Critical: Keep the machine powered ON. Do not shut down or restart the computer or mobile device. Powering off can delete forensic evidence stored in memory (RAM) that investigators might need. The device should stay on but completely isolated from all networks.
BYOD (Personal Devices Connected to Company Email)
If the employee clicked the phishing link on their personal phone or laptop that accesses company email:
- Disconnect immediately using the steps above
- Change the company email password from a different device (this forces the personal device to re-authenticate)
- Remove the company email account from the personal device until IT can verify it's clean
- Consider remote wipe capabilities if your organization uses Mobile Device Management (MDM) like Microsoft Intune or Jamf
Personal devices are harder to secure and audit. If the device accessed sensitive company data, treat it as a company-owned device and follow all containment steps.
From 20 Years of Incident Response
"The biggest mistake I see is a manager rebooting the infected PC, wiping the exact memory forensics we need to track the attacker. RAM contains active processes, network connections, and encryption keys that disappear the moment you power off. Keep it running, keep it isolated."
— Nandor Katai, iFeelTech
Why this matters: Many phishing attacks install malware that immediately tries to:
- Contact a command-and-control server to download additional payloads
- Spread laterally to other computers on your network
- Exfiltrate data (steal files, passwords, or credentials)
Disconnecting stops all of this. Even if malware is already installed, it can't communicate with the attacker or spread further without network access.
What to avoid: Avoid putting the computer to sleep, closing the lid, or restarting the machine. Do not reconnect to the network until completing all containment steps below. The machine must remain isolated throughout this process.
Step 3: Change All Critical Passwords from a Clean Device
Update all critical passwords using an uncompromised smartphone or separate computer to bypass potential keyloggers. Assume the affected device is recording keystrokes and change passwords for email, cloud services, and financial accounts immediately.
Which passwords to change first:
- Email account — This is the highest priority. If attackers control your email, they can reset passwords for everything else
- Cloud services — Microsoft 365, Google Workspace, Dropbox, or any business cloud storage
- Financial accounts — Bank accounts, credit cards, payment processors (Stripe, PayPal, etc.)
- Business-critical apps — Your CRM, accounting software, project management tools
How to change passwords effectively:
- Use strong, unique passwords — At least 16 characters, mix of letters, numbers, and symbols. Better yet, use a password manager to generate and store them
- Don't reuse passwords — Each account should have a completely different password
- Change them from a clean device — Not the computer that clicked the phishing link
If your business doesn't use a password manager, now is the time to implement one. Password managers generate strong passwords, store them securely, and make it easy for your team to use unique passwords for every account. For small businesses, options like 1Password Business and Proton Pass Business offer team-wide credential management with strong security.
Why this matters: Phishing attacks often lead to credential theft. Even if the employee didn't enter their password on the fake site, malware could have installed a keylogger that captures everything they type. Changing passwords from a clean device ensures the attacker can't use stolen credentials to access your accounts.
What to avoid: Avoid changing passwords from the affected computer, as keyloggers may still be active. Never reuse passwords across multiple accounts. Even if credentials weren't entered on the phishing site, malware may have been installed and could capture future keystrokes.
Step 4: Enable Multi-Factor Authentication and Revoke Active Sessions
Enable MFA immediately on all accounts the employee accesses—email, cloud storage, financial systems, and admin panels. Even if passwords were stolen, MFA blocks most unauthorized access attempts. Critically, changing a password does not automatically sign out active sessions, so you must manually revoke them.
Revoke Active Sessions First
Critical: Changing a password does not automatically terminate active login sessions. If an attacker already has an active session token, they can continue accessing the account even after the password is changed. You must manually sign out all active sessions:
Microsoft 365:
- Go to admin.microsoft.com → Users → Active users
- Select the affected user → Click "Sign out of all sessions"
- This forces a re-authentication on all devices
Google Workspace:
- Go to admin.google.com → Directory → Users
- Select the affected user → Security → "Sign out of all web sessions"
- Also check "Revoke all OAuth tokens" to terminate app access
Other cloud services: Look for "Active sessions," "Logged-in devices," or "Security" settings in the account management panel. Sign out all sessions immediately.
Enable MFA on All Critical Accounts
The National Institute of Standards and Technology (NIST) recommends MFA as a foundational security control. Enable it immediately on:
- Email accounts (Microsoft 365, Google Workspace, etc.)
- Cloud storage (Dropbox, OneDrive, Google Drive)
- Financial accounts (bank, credit cards, payment processors)
- Admin panels (website hosting, domain registrar, business apps)
Most services offer MFA in their security settings. Look for "Two-Factor Authentication," "Two-Step Verification," or "Multi-Factor Authentication." Use authenticator apps (Microsoft Authenticator, Google Authenticator) or hardware security keys—never rely on SMS codes alone, as they can be intercepted through SIM swap attacks.
For a comprehensive guide to implementing MFA across your business, see our passkeys implementation guide.
Why this matters: While basic MFA blocks 99% of automated credential attacks (Microsoft, 2025), sophisticated phishing attacks now use Adversary-in-the-Middle (AiTM) techniques to intercept MFA codes in real-time. This is why phishing-resistant MFA methods—authenticator apps, hardware keys, or passkeys—are critical. SMS codes can be intercepted through SIM swap attacks, making them the weakest MFA option for business use.
What to avoid: SMS-based codes can be intercepted through SIM swap attacks—use authenticator apps or hardware keys when possible. While MFA significantly improves security, it's not foolproof against all attack methods, particularly advanced phishing techniques.
Step 5: Check for Signs of Account Compromise
Examine email sent folders, login history, and account settings for evidence that attackers accessed systems. Look for unexpected emails sent on the employee's behalf, logins from unfamiliar locations, or new forwarding rules.
What to check:
Email Account
- Sent folder — Look for emails the employee didn't send (attackers often use compromised accounts to send phishing emails to contacts)
- Deleted items — Attackers sometimes delete sent emails to cover their tracks
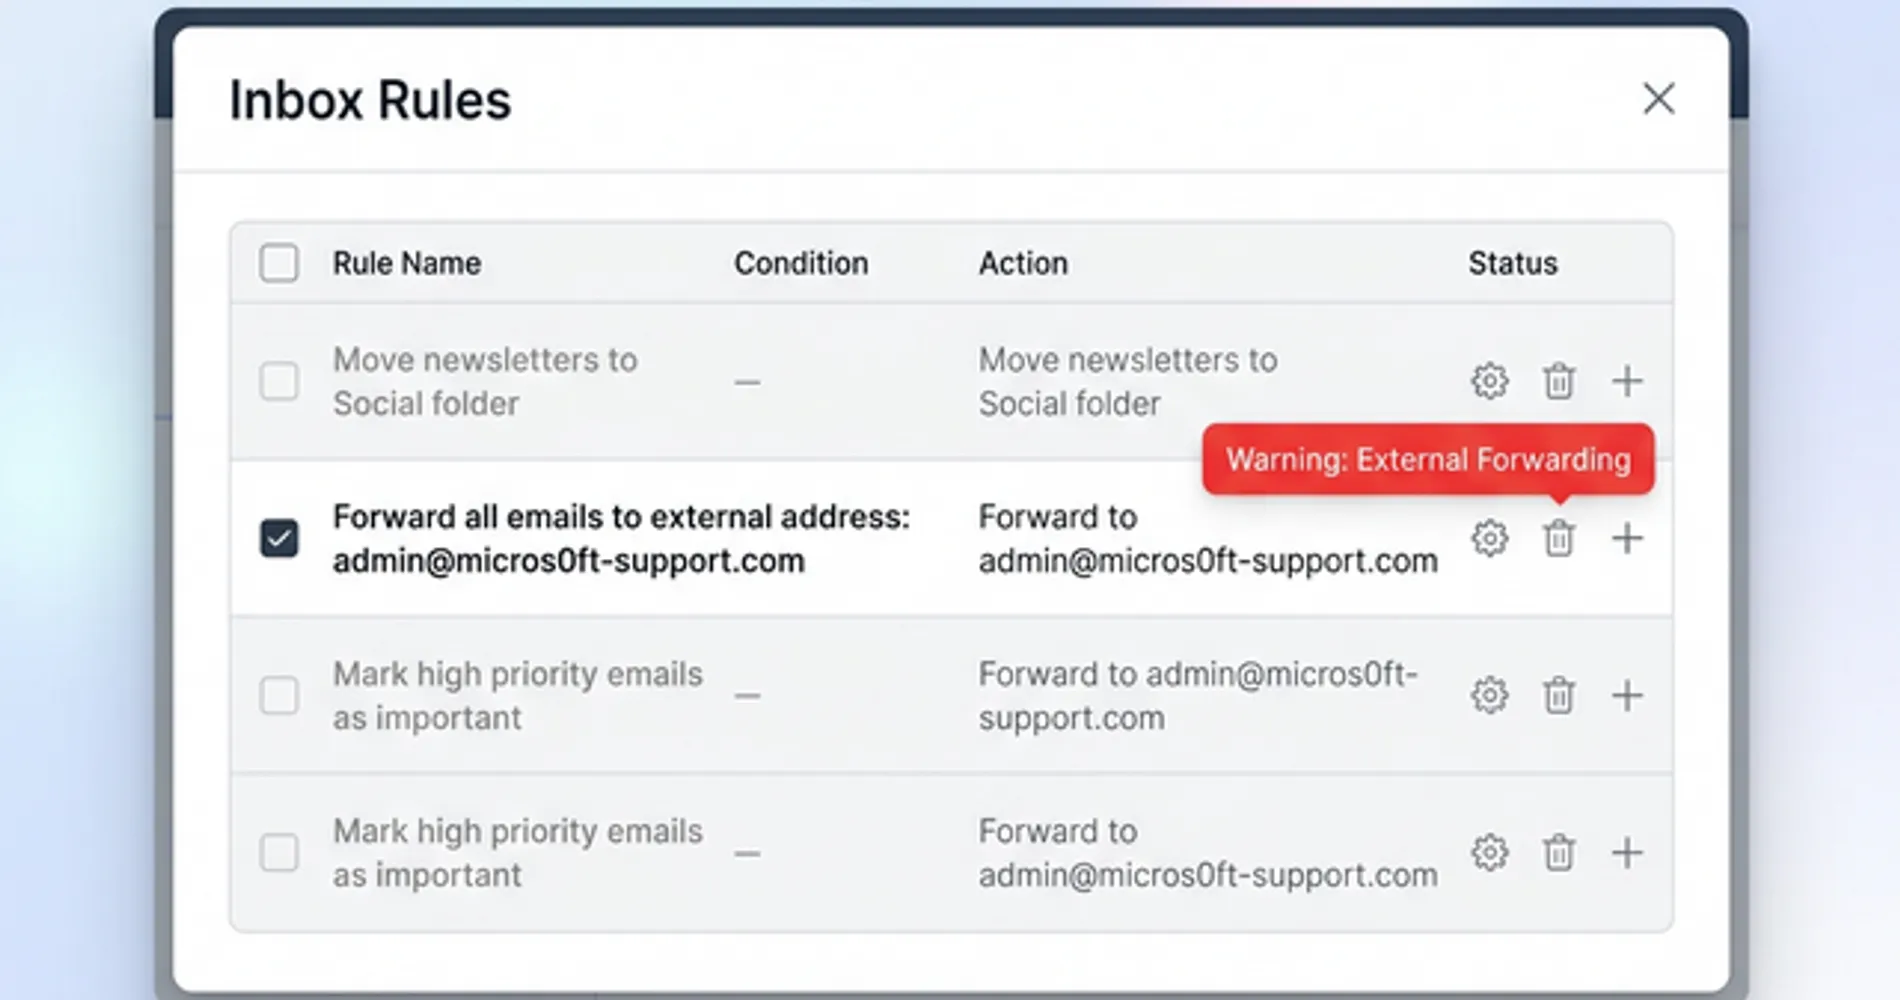
- Inbox rules (CRITICAL) — Check immediately for forwarding rules that send copies of emails to external addresses. This is one of the first things attackers configure to monitor your communications without detection
- Login history — Most email providers show recent login locations and IP addresses. Look for logins from unfamiliar locations or countries
Cloud Storage and Business Apps
- Recent file activity — Check for files downloaded, shared, or deleted that the employee didn't touch
- Shared links — Look for new publicly accessible links to sensitive files
- User permissions — Verify no new users or external accounts were granted access
Financial Accounts
- Recent transactions — Look for unauthorized transfers, charges, or changes to payment methods
- Account settings — Check for changes to email addresses, phone numbers, or security questions
How to check login history:
- Microsoft 365: Go to portal.office.com → My Account → Security info → Sign-in activity
- Google Workspace: Go to myaccount.google.com → Security → Your devices → Manage devices
- Most other services: Look for "Security," "Login History," or "Recent Activity" in account settings
Why this matters: Early detection of unauthorized access enables faster containment. Evidence of compromise (unexpected emails sent, files accessed, or logins from unfamiliar locations) indicates successful account access and requires immediate escalation.
What to avoid: Absence of obvious signs doesn't guarantee security. Attackers often operate subtly and may access accounts without leaving clear traces. If anything appears suspicious, treat the account as compromised and escalate accordingly.
Step 6: Scan for Malware with Business-Grade Tools
Run a full system scan using business-grade endpoint detection to identify and quarantine hidden malicious files. Use your existing EDR tool or Windows Defender—avoid reconnecting to the network until the scan completes and shows clean results.

If you have business endpoint security:
Run a full system scan using your existing EDR tool (Microsoft Defender for Business, Malwarebytes ThreatDown, CrowdStrike, SentinelOne, etc.). A full scan checks every file on the computer, not just recently downloaded files.
If you only have Windows Defender or macOS built-in protection:
Use Windows Defender (built into Windows) or macOS's built-in malware scanning for an immediate scan. However, these consumer-grade tools lack the behavioral detection and centralized management that business environments require. For ongoing protection, implement business-grade endpoint detection and response (EDR) software like Microsoft Defender for Business or Malwarebytes for Business.
What clean vs. infected results look like:
- Clean scan: "No threats detected" or "0 threats found"
- Infected scan: The software will list specific threats detected, usually with names like "Trojan.Generic," "Ransomware.Lockbit," or "Adware.BrowserModifier"
If malware is detected:
- Follow the software's recommended action (usually "Quarantine" or "Remove")
- Run the scan again to verify the threat is eliminated
- Do not reconnect to the network yet—even if the second scan returns clean results
Why this matters: Phishing links often trigger automatic malware downloads—even if the page looked blank or showed an error. Malware can steal additional data, install ransomware, or create backdoors for future attacks. Scanning catches these threats before you reconnect the computer to your network.
What to avoid: Never skip the scan based on assumptions. Avoid reconnecting to the network immediately after the scan completes. A single clean scan doesn't guarantee complete safety—sophisticated malware can evade detection tools.
When to Call for Professional Help
Certain situations require immediate professional assistance. Attempting to resolve these issues without expertise can complicate recovery efforts.
Contact a cybersecurity professional or incident response team immediately if you observe any of the following:
Active Compromise Indicators
- Ransomware note or locked files — If you see a ransom demand or files with extensions like
.locked,.encrypted, or.crypted, stop and contact professional help immediately - Unknown accounts created — New user accounts on your systems that you didn't create
- Ongoing suspicious activity — Files being encrypted in real-time, network traffic to unknown destinations, or processes running that you don't recognize
Sensitive Data Exposure
- Customer data accessed — If the compromised account had access to customer records, payment information, or personal data
- Financial system access — If the employee has access to bank accounts, payment processors, or accounting systems
- Regulated data — If your business handles HIPAA (healthcare), PCI (payment cards), or other regulated data
Uncertainty About Scope
- Multiple employees affected — If more than one person clicked similar links or you see signs of lateral movement
- Can't determine what happened — If you're not sure whether data was stolen, accounts were accessed, or malware was installed
- Cyber insurance claim — If you have cyber insurance, call your carrier immediately—they often provide incident response services
Where to find help:
- Your IT provider — If you have a managed service provider (MSP), call them first
- Cyber insurance carrier — Most policies include incident response services
- Incident response firms — Companies that specialize in breach response and forensics
- FBI Internet Crime Complaint Center — For reporting cybercrime at ic3.gov
- CISA (Cybersecurity & Infrastructure Security Agency) — Report significant incidents at cisa.gov/report
When to Report to Law Enforcement and Regulatory Authorities (Days 2-3)
After completing immediate containment, you may need to report to authorities. The timeline depends on the severity and type of data exposed:
Immediate reporting required (within 24-72 hours):
- Financial fraud — Unauthorized wire transfers, ACH transactions, or credit card charges. Report to FBI IC3 and your bank's fraud department
- Regulated data exposed — HIPAA (healthcare), PCI (payment cards), or FERPA (education) data accessed or stolen. Report to relevant regulatory body
- Critical infrastructure — If your business provides essential services (utilities, healthcare, finance), report to CISA immediately
Standard reporting timeline (30-60 days):
- State breach notification laws — If customer or employee personal information (names, SSNs, financial data) was exposed, most states require notification within 30-60 days. Consult legal counsel for specific state requirements
- GDPR/International — If you have EU customers and their data was compromised, GDPR requires notification within 72 hours
When reporting is optional but recommended:
- Attempted but unsuccessful attacks — Even if no data was stolen, reporting to FBI IC3 helps law enforcement track phishing campaigns
- Business email compromise attempts — Report to reportfraud@ic3.gov to help shut down the operation
What information to provide when reporting:
- Screenshots of the phishing email and fake website
- Email headers (showing sender IP and routing information)
- Timeline of events (when clicked, what actions were taken)
- Scope of potential data exposure
- Any ransom demands or attacker communications
Why professional help matters: Incident response professionals have forensic tools and experience that help them:
- Determine exactly what data was accessed or stolen
- Find hidden malware that scans miss
- Contain the breach before it spreads further
- Document the incident for insurance claims and legal requirements
- Guide you through notification obligations if customer data was exposed
What to avoid: Deleting files or wiping systems before professional investigation destroys forensic evidence. Paying ransoms without legal guidance may violate OFAC sanctions. If you observe active compromise indicators, professional assistance is necessary.
For more on what happens during a full-scale breach, see our timeline of what happens when a business gets hacked.
The Honest Conversation to Have with Your Team
After containing the immediate threat, address the incident with your team. Your approach to this conversation influences whether employees report future incidents or conceal them.
Ineffective approach:
"Who clicked the phishing link? This is unacceptable. We've told you repeatedly to be careful with emails."
This creates a culture of blame where employees conceal future incidents, leading to delayed detection and greater damage.
Effective approach:
"We had a phishing incident this week. An employee received a convincing email that appeared to come from [familiar source]. They clicked it and immediately reported it to us. Because they reported it quickly, we contained the threat before damage occurred. This is exactly what we want—fast reporting, not perfect judgment."
Key points to emphasize:
This Is a Systems Problem, Not a Person Problem
Phishing attacks succeed against all types of users. In 2026, AI-generated phishing emails are nearly indistinguishable from legitimate messages. Security researchers, IT professionals, and cybersecurity experts have all fallen for sophisticated phishing attacks. The issue isn't individual vigilance—it's that modern phishing techniques are designed to bypass human judgment.
Reporting Quickly Is the Right Response
The employee who clicked the link and immediately reported it did exactly the right thing. Fast reporting is what allowed you to contain the threat. Emphasize that you want employees to report suspicious activity immediately, even if they're not sure whether it's a real threat.
What to Watch For (Brief Refresher)
Use this as a teaching moment, but keep it brief and actionable:
- Unexpected urgency — "Your account will be suspended unless you act now"
- Requests for credentials — Legitimate companies don't ask for passwords via email
- Mismatched sender addresses — The display name says "Microsoft" but the email address is
@micros0ft-support.com - Generic greetings — "Dear Customer" instead of your actual name
For a comprehensive visual guide to spotting phishing emails, share our how to spot phishing email guide with your team.
The same social engineering pattern has also moved to the phone: AI voice cloning lets attackers impersonate an executive on a live call and request wire transfers or password resets. Our AI vishing and deepfake CEO fraud guide covers the phone-channel version of this attack and the verification protocol that stops it.
The Reporting Process
Make it clear and simple:
- Stop immediately — Don't click further, don't enter information
- Report to [specific person/email] — Give them a clear point of contact
- Don't delete the email — Forward it or take a screenshot
- No judgment — Emphasize again that reporting is the right action
Why this matters: Organizations with strong security cultures—where employees feel safe reporting mistakes—detect and contain breaches faster. Organizations that punish employees for clicking phishing links create a culture of silence, where incidents are hidden until they become full-scale breaches.
The goal isn't to have employees who never make mistakes. The goal is to have employees who report mistakes immediately so you can respond before damage spreads.
Building a Security-First Culture
Organizations with strong security cultures detect and contain breaches 76% faster than those with punitive reporting environments. Fast reporting is your most valuable security control—protect it by responding supportively to incidents.
Frequently Asked Questions
Was this a data breach? Do I need to notify anyone?
It depends on what happened after the click. If the employee only clicked the link but didn't enter any information, and your scan shows no malware, you likely don't have a reportable breach. However, if credentials were entered, accounts were accessed, or customer/employee data was exposed, you may have notification obligations under state breach laws (like California's CCPA) or federal regulations (like HIPAA for healthcare). Consult with legal counsel if you're unsure—most states require notification within 30-60 days of discovering a breach.
What if they entered their password on the fake site?
Assume the password is compromised. Change it immediately from a different device, enable MFA if not already active, and check the account's login history for unauthorized access. If the employee uses the same password elsewhere (they shouldn't, but many do), change those passwords too. Monitor the account closely for the next 30 days for suspicious activity like unexpected emails sent, forwarding rules created, or login attempts from unusual locations.
Should I tell the rest of the team about this incident?
Yes, but frame it constructively. Share what happened (without naming the employee if possible) and use it as a learning moment. For example: "We had a phishing attempt this week that got through. Here's what it looked like and what to watch for." This builds awareness without creating a culture of fear or blame. The goal is to encourage reporting, not discourage it.
How do I know if the malware scan actually found everything?
No single scan can guarantee complete detection. Modern malware is designed to evade detection tools. This is why you should follow all containment steps—disconnect, change passwords, check for compromise—even if the scan returns clean results. If you observe ongoing suspicious activity (unexpected emails, slow performance, unusual network traffic), treat the system as compromised and contact a professional. When uncertain, err on the side of caution.
Can I just restore from backup and call it done?
Not immediately. If malware infected the machine, restoring from backup without understanding the attack vector may restore the vulnerability. First, identify what happened (malware download, credential theft, etc.), then contain it (disconnect, scan, change passwords). Only after confirming the threat is contained should you consider restoring from backup. Verify your backup isn't infected by restoring to a clean, isolated environment first.
Moving from Incident Response to Prevention
After containing the immediate threat, focus on strengthening your security posture to prevent future incidents.
Immediate next steps (this week):
- Verify MFA is enabled on all critical business accounts
- Review email security settings in Microsoft 365 or Google Workspace—enable advanced phishing protection if available
- Schedule a team security refresher using the conversation framework above
- Document what happened for your records and insurance purposes
Medium-term improvements (this month):
- Implement a password manager if you don't have one—this prevents password reuse and makes credential changes easier
- Review your backup strategy to ensure you can recover if ransomware hits (see our 3-2-1 backup rule guide for implementation)
- Consider endpoint security upgrades if you're relying on consumer antivirus
- Create an incident response plan so you know exactly what to do next time
Why Business Endpoint Security Matters
If you're using consumer antivirus (or just Windows Defender) for business computers, you're missing critical protections. Business endpoint security tools offer:
- Behavioral detection that catches threats traditional antivirus misses
- Automatic isolation of infected machines
- Centralized management across all your computers
- Compliance with cyber insurance requirements
Options include Microsoft Defender for Business (integrated with Microsoft 365), Malwarebytes for Business, or other EDR platforms. For a detailed comparison, see our guide on EDR vs antivirus for small business.
Long-term security posture (this quarter):
- Conduct a security audit to identify other vulnerabilities
- Evaluate cyber insurance if you don't have coverage—it often pays for incident response and legal costs
- Implement security awareness training beyond just "watch out for phishing"
- Review your security stack to ensure you have appropriate protections for your business size and risk level
For a comprehensive 90-day security improvement plan, see our small business breach prevention guide.
Related Resources
-
How to Spot a Phishing Email: A Visual Guide — Prevention companion to this response guide. Learn to identify phishing emails before anyone clicks.
-
AI Vishing and Deepfake CEO Fraud: What Small Businesses Need to Know — The phone-channel companion: what to do when the attack arrives as a cloned voice instead of an email.
-
What Happens When Your Business Gets Hacked: A Real-World Timeline — If the incident escalates beyond a single phishing click, this guide shows what to expect in the hours, days, and weeks that follow.
-
Small Business Breach Prevention: 90-Day Security Plan — Practical steps to reduce your breach risk, including MFA implementation, patch management, and incident response planning.
-
Passkeys for Small Business: Implementation Guide — Move beyond passwords with phishing-resistant authentication. Includes ROI analysis and 90-day rollout strategy.
-
EDR vs Antivirus: Do Small Businesses Really Need EDR? — Understand the difference between traditional antivirus and modern endpoint detection and response, and when to upgrade.
-
Small Business Cybersecurity Guide: Top Tools 2026 — Comprehensive guide to security tools for small businesses, from platform security to network infrastructure and endpoint protection.
-
Small Business Security Audit Checklist — After resolving a phishing incident, use this seven-step audit to identify the controls that should have caught it — and close the gaps.
Related Articles
More from Cybersecurity
What Happens When Your Business Gets Hacked: A Real-World Timeline
A practical, phase-by-phase timeline of what happens when a small business gets hacked — from discovery through recovery — with verified 2025 data and actionable guidance at each stage.
16 min read
Are Free VPN Extensions Safe for Small Businesses? A July 2026 Check
Recent VPN incidents showed how extensions can expose passwords, AI conversations, and browser traffic. Learn how to audit extensions, build an allowlist, and protect your company.
11 min read
Double Extortion Ransomware: Why Backups Alone Aren't Enough
Data exfiltration appears in 96% of BlackFog-tracked Q1 2026 ransomware incidents. Backups restore access but don't resolve data exposure. Here's what actually protects your business.
13 min read