DIY Security: Affordable UniFi Protect CCTV Setup
Complete guide to building your own UniFi Protect surveillance system. Learn about G6 cameras, AI features, ONVIF integration, and cost-effective CCTV setup without monthly fees.

Key Takeaway
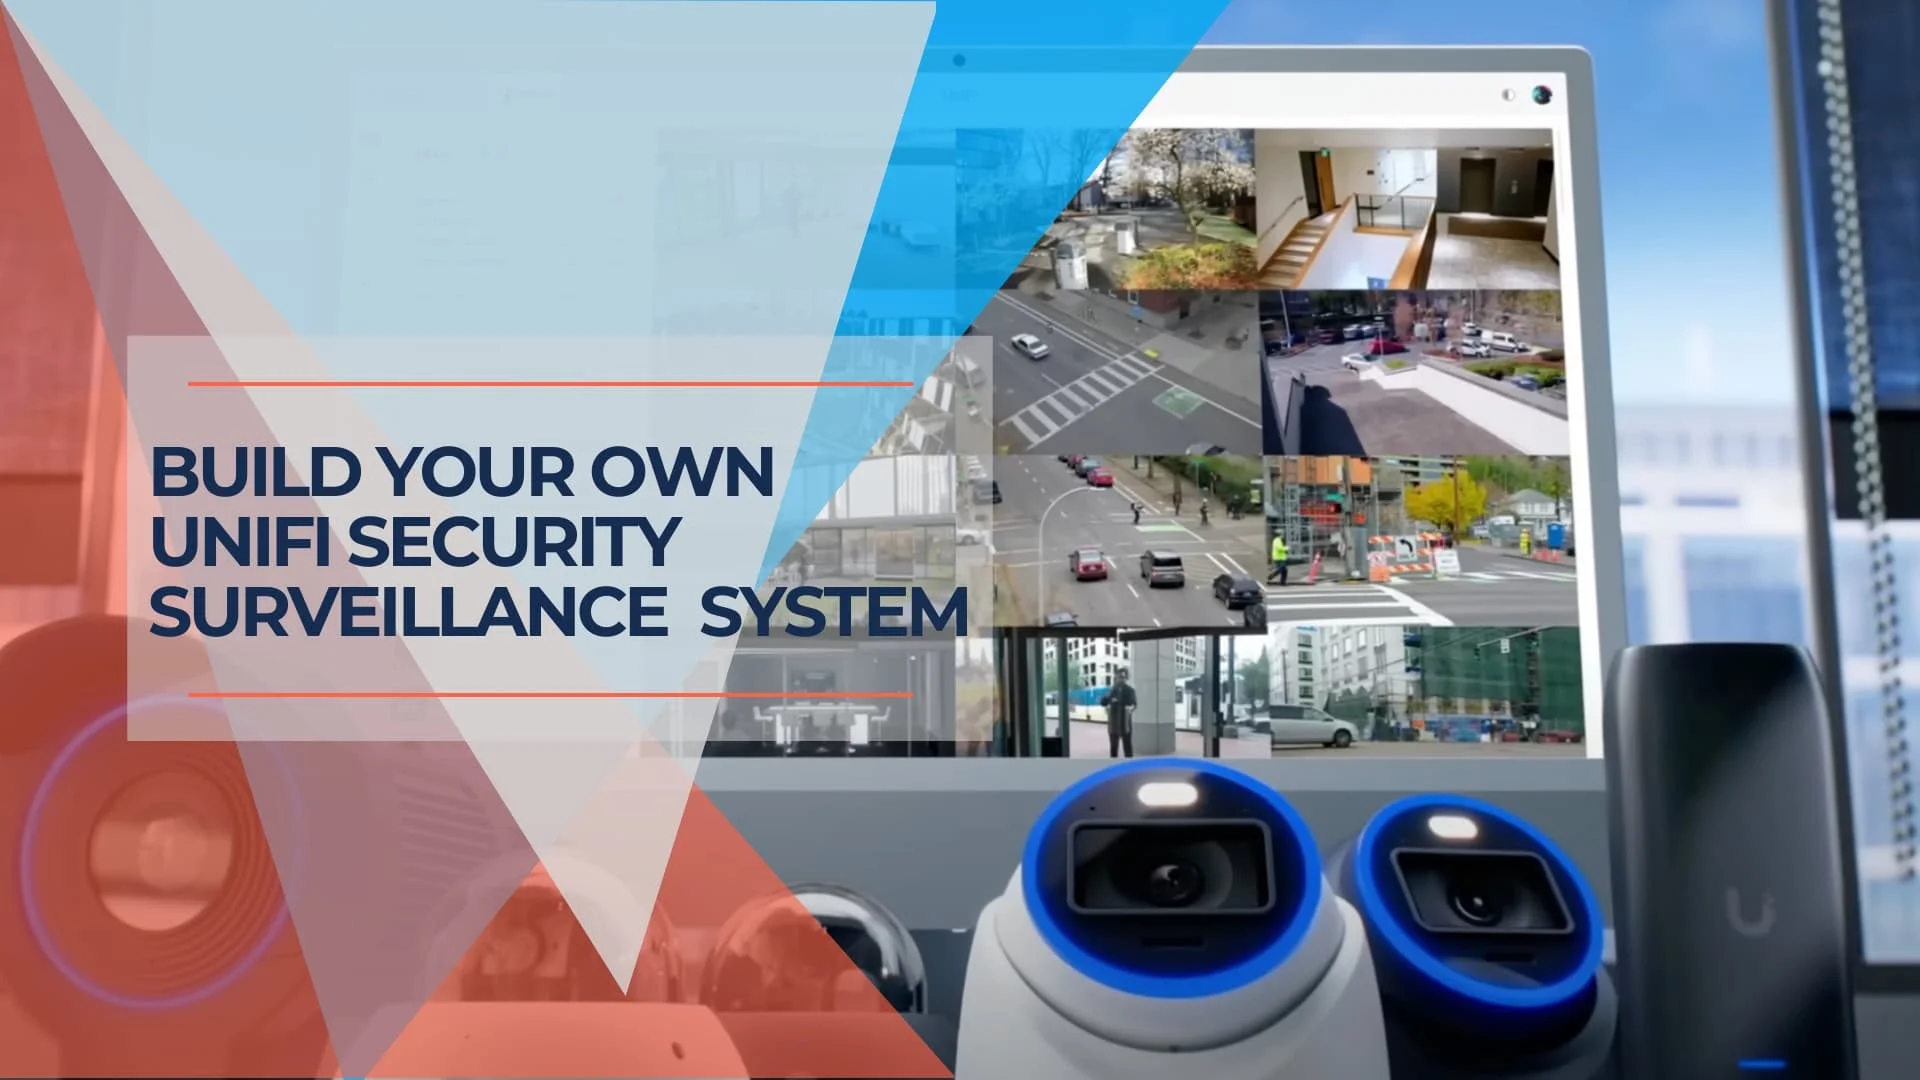
UniFi Protect offers a cost-effective, subscription-free CCTV solution with local storage, AI-powered smart detection, and excellent scalability. The 2025 G6 camera series brings premium features like 4K resolution and face recognition to cameras under $200, while ONVIF support allows integration of existing third-party cameras.
Video surveillance is a practical tool for businesses and homeowners looking to enhance security. Ubiquiti Networks' UniFi Protect system offers a cost-effective and scalable alternative to traditional CCTV solutions. It provides high-quality video monitoring without recurring subscription fees, making it an attractive option for those seeking to bolster security without significant ongoing costs.
This guide provides a comprehensive overview of deploying a UniFi Protect system, covering everything from initial planning to ongoing maintenance. It is accessible for both seasoned tech enthusiasts and business owners new to IP camera setups. We will focus on delivering practical advice and clear instructions to help you build a surveillance system that fits your specific needs and budget.
Last updated: August 2025 with the latest G6 camera series, AI Port capabilities, and UniFi Protect 5.0 features.
| Feature | Benefit | Why It Matters |
|---|---|---|
| No Monthly Fees | Avoids the recurring subscription costs of cloud-based systems | Lower total cost of ownership and predictable budgeting |
| Local Storage | Keeps your video data on your hardware | Enhanced privacy and control over your sensitive footage |
| Scalable System | Start small and add cameras as needed | Cost-effective growth, the system adapts to your evolving needs |
| AI-Powered Smart Detection | Reduces false alerts and focuses on relevant events (people, vehicles) | More efficient monitoring and faster response to actual threats |
| User-Friendly Interface | Easy setup and management, even for non-experts | Less time spent on configuration and more on security |
| Remote Access & Alerts | Monitor your property from anywhere via the mobile app | Proactive security and peace of mind on the go |
| ONVIF Compatibility | Integrate existing third-party cameras without additional costs | Protect previous camera investments while upgrading gradually |
Understanding the UniFi Protect Ecosystem
UniFi Protect is Ubiquiti's video surveillance platform, designed to be robust and user-friendly. It's a comprehensive system beyond basic recording, offering features catering to novice users and experienced IT professionals. Unlike many traditional CCTV systems, UniFi Protect operates without monthly subscription fees. This is possible because recorded footage is stored locally rather than in the cloud. Let's explore the key features and requirements:
- No Recurring Fees: One of UniFi Protect's most significant advantages is the absence of mandatory recurring subscription fees. This can lead to substantial cost savings over time compared to cloud-based surveillance systems.
- Local Storage: Your video footage is stored directly on your own hardware, giving you greater control over your data and enhancing privacy. Local storage also typically allows for quicker access to recordings.
- AI-Driven Smart Detection: The latest UniFi cameras offer intelligent detection capabilities that can distinguish between people, vehicles, and other objects. Advanced models now include face recognition and license plate detection, helping to minimize false alerts and allowing you to focus on events that truly matter.
- ONVIF Compatibility: UniFi Protect 5.0 introduced support for third-party ONVIF cameras, allowing you to integrate existing cameras from other manufacturers without additional licensing fees.
- Remote Access: The UniFi Protect mobile app (available for iOS and Android) allows you to view live camera feeds and recordings from anywhere with an internet connection.
- Scalability: UniFi Protect is designed to grow with your needs. You can easily add more cameras to your system as your requirements evolve.
System Requirements
- UniFi OS Console: At the heart of the UniFi Protect system is a UniFi OS Console. This device acts as the central hub, managing your cameras, storing recordings, and providing the interface for accessing the system. Popular options include the Cloud Key Gen2 Plus, the Dream Machine Pro/SE/Max, and the Network Video Recorder (UNVR) or UNVR-Pro, each offering varying storage capacity and processing power levels.
- Network Infrastructure: A stable network is crucial for optimal performance. While UniFi Protect can function on a wireless network, a wired connection using Ethernet cables is highly recommended for the best camera performance. Power over Ethernet (PoE) switches are handy, as they provide power and data connectivity to your cameras through a single cable.
Introducing: UniFi Protect 6.0
Planning Your UniFi CCTV Deployment
Before installing any equipment, careful planning must ensure your UniFi Protect system meets your security needs. This involves a thorough site assessment and selecting the appropriate hardware for your specific environment.
Site Assessment: Laying the Groundwork for Success
- Identify Vulnerable Areas: Begin by identifying areas susceptible to security breaches. Consider potential entry points, such as doors and windows, as well as areas where valuable assets are stored. Don't overlook areas like loading docks, parking lots, and less-trafficked parts of your property.
- Camera Placement Strategy:
- Field of View: Each UniFi camera model has a specific field of view. Choose cameras with appropriate lenses to cover the desired areas effectively. Wider fields of view are suitable for large spaces, while narrower fields of view are better for focusing on specific points of interest.
- Height and Angle: Mounting height and angle significantly impact coverage. Generally, cameras should be mounted high enough to prevent tampering but low enough to capture clear facial details. Experiment with different angles to optimize visibility and minimize blind spots.
- Consider Obstructions: Be mindful of potential obstructions like trees, walls, or signage that could block the camera's view. Plan camera placement to avoid these obstacles or consider adjusting the environment if necessary.
- Lighting Conditions:
- Day/Night Vision: Most UniFi cameras feature infrared (IR) LEDs for night vision. However, the effectiveness of IR can vary. Evaluate the ambient lighting in each area and consider cameras with strong low-light performance for areas with minimal illumination.
- Supplemental Lighting: In areas with very poor lighting, consider installing external lighting to improve image quality and enhance the effectiveness of motion detection.
- Power Source Considerations:
- PoE (Power over Ethernet): PoE is the recommended method for powering UniFi cameras, as it simplifies installation by providing both power and data through a single Ethernet cable.
- PoE Switches/Injectors: Ensure you have a PoE switch with enough ports and a sufficient power budget for all your cameras. If you don't have a PoE switch, you can use PoE injectors to power individual cameras.
- Alternative Power Options: While less common, some cameras may be powered by separate AC or DC adapters if PoE is not feasible.
- Environmental factors: What type of weather will these cameras have to endure? Is there a risk of vandalism? Make sure you pick a suitable camera for the environment.
UniFi Design Center Feature: Floor Plans
Using the UniFi Design Center for Optimal Camera Placement
Ubiquiti offers a free online tool called the UniFi Design Center that can significantly aid in planning your camera deployment. This powerful tool allows you to upload your floor plan and virtually place UniFi devices, including cameras, to visualize coverage and optimize placement.
Here's how to use the UniFi Design Center for planning your surveillance system:
- Create a New Project or Sign In: If you don't have an account, you'll need to create a new one. After that, you can create a new project.
- Upload Your Floor Plan: You can upload a floor plan image (PNG, JPG, or SVG) or create one from scratch using the tool's built-in design features. Ensure the scale of the floor plan is accurately set for realistic simulations.
- Select Your UniFi OS Console: Choose the console that will be the foundation of your system.
- Add Cameras to the Floor Plan: Select the UniFi Protect cameras you intend to use from the device list and drag and drop them onto your floor plan. You can adjust their position, rotation, and height to simulate real-world placement.
- Visualize Coverage: The Design Center will display the estimated coverage area for each camera, considering its field of view and mounting height. This helps you identify potential blind spots and ensure adequate coverage of critical areas.
- Experiment and Optimize: Try different camera positions and models to find the most effective layout. The Design Center allows you to easily move devices, change their settings, and see the real-time impact on coverage.
Choosing the Right Equipment
After completing a thorough site assessment, you can now select the appropriate UniFi Protect equipment for your specific needs. This includes choosing the right UniFi OS Console to manage the system and the best camera models for each location.

UniFi Protect Consoles
The UniFi OS Console is the central management device for your UniFi Protect system. It handles video recording, user access, and overall system configuration. Here are the primary options:
- UniFi Cloud Key Gen2 Plus (UCK-G2-PLUS): This compact and affordable option is suitable for smaller installations and typically supports up to 20 cameras. It includes a built-in hard drive (which can be upgraded) for video storage. At around $249, it is a great starting point for home users.
- UniFi Dream Machine Pro (UDM-Pro): This more powerful all-in-one device combines a network video recorder with a full-featured network controller. It's suitable for larger deployments and offers advanced networking features. It can support more cameras than the Cloud Key Gen2 Plus and is ideal for small to medium-sized businesses at around $379.
- UniFi Dream Machine Special Edition (UDM-SE): Similar to the UDM-Pro, but includes built-in PoE ports and an integrated 128 GB SSD for faster UniFi OS responsiveness. Priced around $499.
- UniFi Dream Machine Max (UDM-Max): The latest in the Dream Machine line, this model offers even greater performance than the UDM-Pro/SE. Designed for larger deployments with increased device capacity (200+ UniFi devices and 2,000+ clients), it supports up to 5 Gbps routing with IDS/IPS. The built-in 128GB SSD offers faster responsiveness, and the dual 3.5" NVR HDD bays feature RAID data protection. Priced at around $599.
- UniFi Network Video Recorder (UNVR / UNVR-Pro): This dedicated network video recorder is designed for large-scale deployments. The UNVR can hold up to four hard drives for maximum storage capacity, while the UNVR-Pro can hold seven. The UNVR starts at around $299, while the UNVR-Pro costs around $999.
- UniFi Enterprise NVR (UNVR-Enterprise): The ultimate solution for enterprise deployments. It supports up to 560 megapixel cameras and up to 240 terabytes of storage in RAID5 configuration. Priced around $1,999.
UniFi Camera Options
UniFi offers a diverse range of cameras to suit various surveillance needs. Here's a breakdown of the latest models, including the recently released 2025 lineup:
G6 Series (2025 - Latest Generation)
The newest addition to the UniFi camera lineup, the G6 series, brings premium features to an accessible price point:
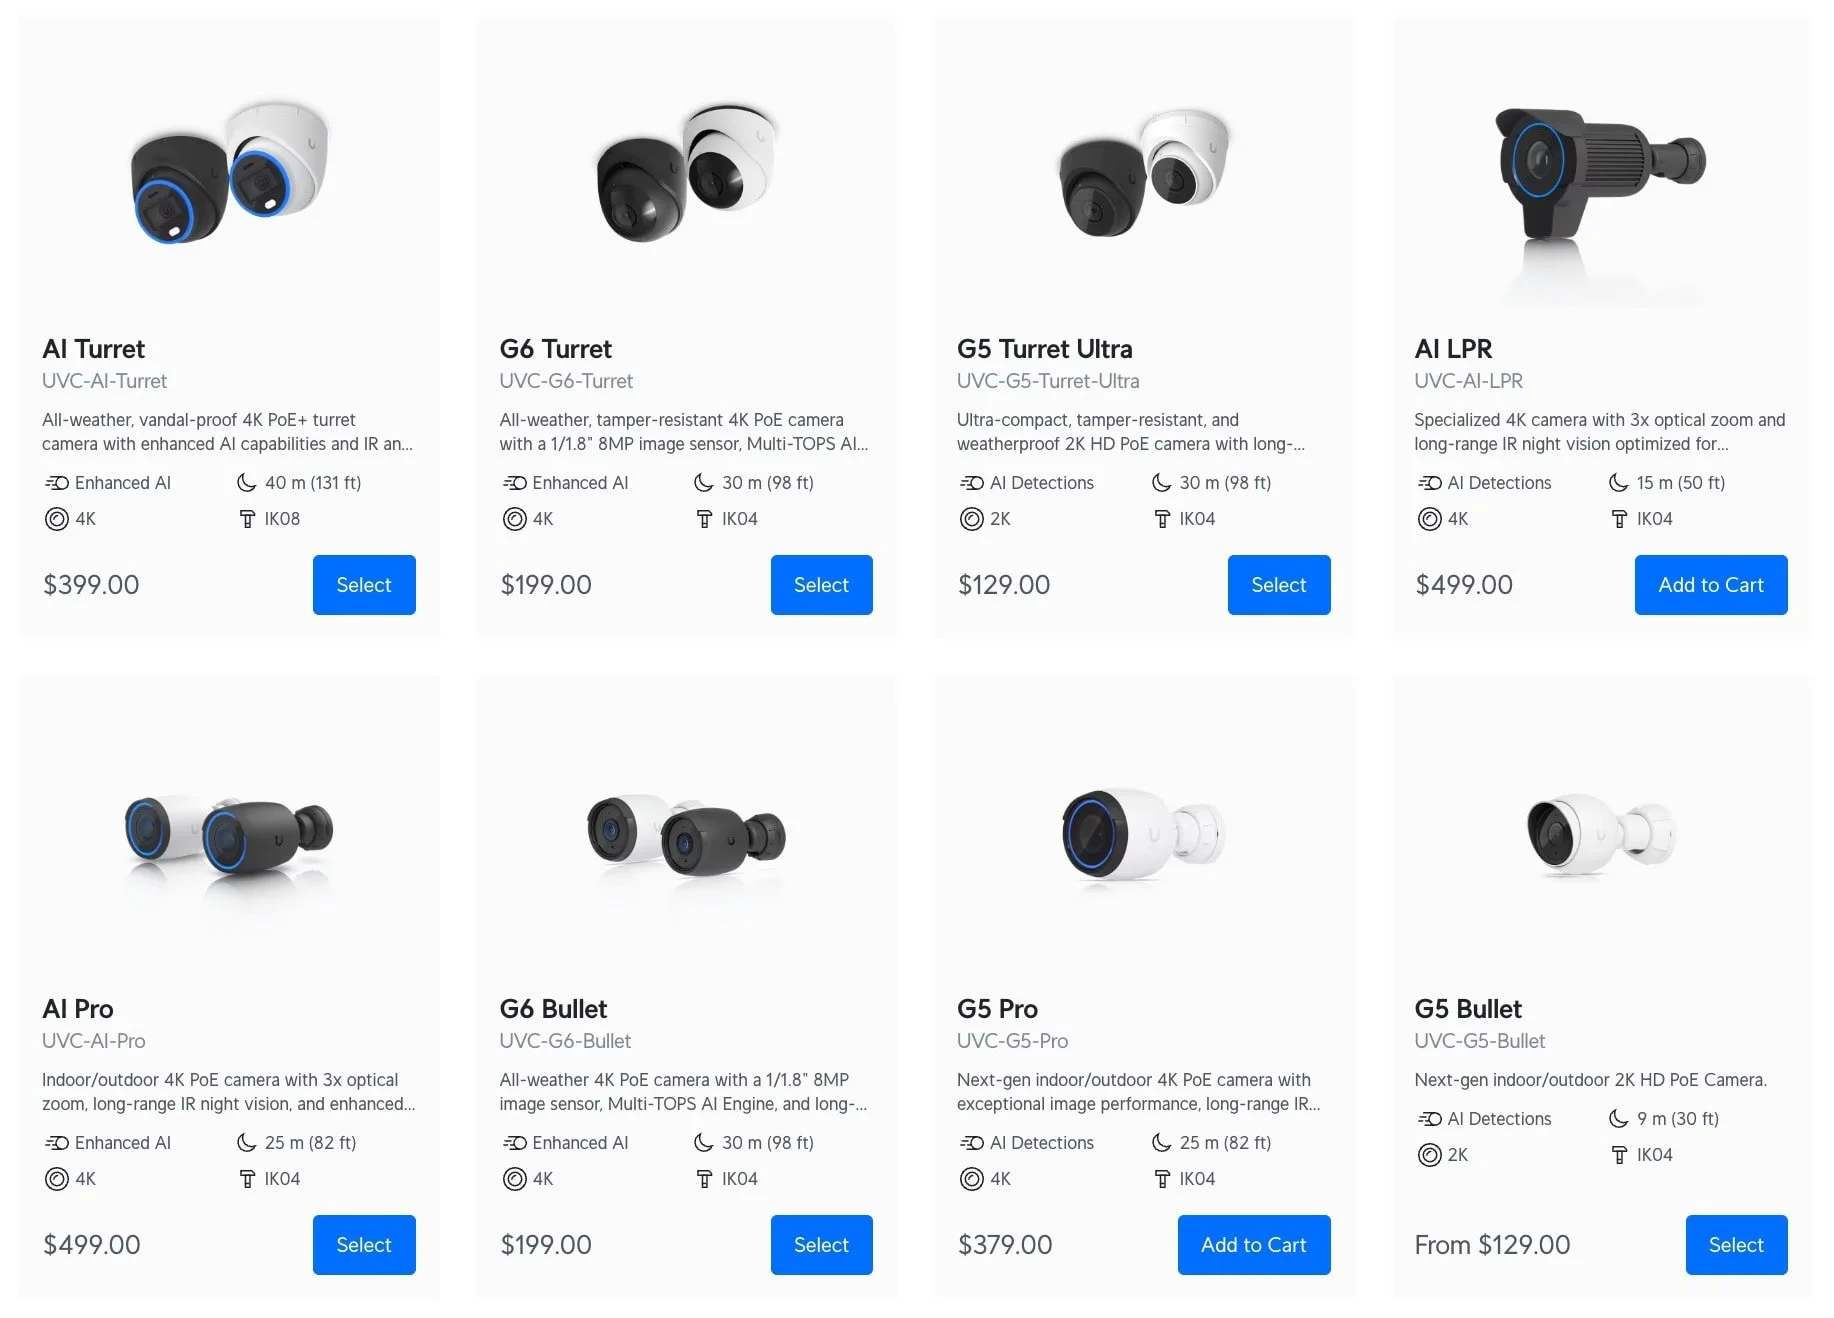
- G6 Bullet: This versatile outdoor camera features a 1/1.8" 8MP sensor delivering crisp 4K resolution at $199. It includes built-in AI capabilities for face recognition and license plate detection, glare-free IR illumination up to 30 meters, and IP66 weather resistance. Available in black or white finishes.
- G6 Turret: Identical performance to the G6 Bullet in a sleek, compact turret design for $199. Perfect for locations where a more discreet camera profile is preferred, featuring the same 4K sensor and AI capabilities with 3-axis manual adjustment for flexible installation.
- G6 Instant: A revolutionary wireless camera at $179 that brings true 4K resolution and full AI capabilities to locations without ethernet access. Features a plug-and-play setup using UniFi Auto-Link and maintains the same 1/1.8" 8MP sensor as its wired siblings.
- G6 Dome: An ultra-robust dome camera with IK10 vandal-proof rating and 4K 8MP imaging, ideal for high-traffic areas requiring tamper resistance.
- G6 180: Combines two 1/1.8" 8MP sensors to create a seamless 16MP, 180-degree ultra-wide image, allowing coverage of large areas with fewer cameras.
- G6 PTZ: An upgraded PTZ camera at $399 featuring dual cameras, 4K video capability, 10X hybrid zoom, integrated LED spotlight, speaker for two-way audio, and a MicroSD card slot for edge recording.
AI Series (Premium Line)
- AI Pro: This top-of-the-line camera provides 4K resolution, enhanced low-light performance with a large 1/1.8" sensor, 3x optical zoom, and advanced AI features including facial recognition and license plate detection.
- AI Turret: An all-weather, vandal-proof 4K PoE+ turret camera with enhanced AI capabilities, long-range night vision, and a large image sensor with IR and visible LEDs.
- AI Dome: All-weather, vandal-proof 4K PoE dome camera with enhanced AI capabilities and long-range IR night vision.
- AI 360: This camera provides a wide, 360-degree view using a fisheye lens and de-warping software, ideal for covering large rooms or open spaces with AI-powered motion detection.
- AI Theta: A unique, discreet camera system with a separate lens and body connected by cable, supporting different lens options, including 360-degree coverage for specialized installations.
- AI PTZ Industrial: Built to withstand extreme environments, this $1,299 PTZ camera combines a hardened enclosure with 4K imaging and advanced AI features like person, vehicle, and animal detection.
- AI PTZ Precision: The flagship PTZ model (launching Q3 2025) features 31x optical zoom, ultra-fast auto focus, and advanced LiDAR technology for mission-critical surveillance applications.
G5 Series (Value-Focused)
- G5 Bullet: This versatile camera is suitable for indoor and outdoor use. Its 5MP sensor provides sharp and detailed images, and its infrared LEDs ensure clear visibility even in low-light conditions.
- G5 Dome: Designed for discreet indoor or outdoor installations. It features a low-profile design and a 5MP sensor, similar to the G5 Bullet.
- G5 Flex: This compact and budget-friendly camera is perfect for indoor use. Its 1080p resolution provides clear images, and its flexible mounting options make it easy to install.
- G5 Professional: Offers enhanced image quality with a large 1/1.8" sensor, 4K resolution at 30 FPS, 3x powered optical zoom, and long-range adaptive IR LEDs.
- G5 Turret Ultra: This ultra-compact, tamper-resistant, and weatherproof 2K HD PoE camera has long-range night vision.
- G5 Dome Ultra: This ultra-compact and tamper-resistant 2K HD PoE camera with night vision is designed for low-profile indoor security.
- G5 PTZ: This compact, all-weather camera features ultra-low latency pan-tilt-zoom control and versatile mounting options.
G4 Series (Professional Grade)
- G4 Doorbell Pro: This video doorbell integrates seamlessly with the UniFi Protect system. It features a primary camera that shows who is at your door and a secondary downward-facing camera that keeps an eye on packages. It also includes two-way audio for communicating with visitors remotely.
- G4 PTZ: This is a high-performance 4K resolution Pan-Tilt-Zoom (PTZ) camera designed for demanding surveillance applications. It features 22x optical zoom, long-range infrared night vision, and advanced features like motion tracking and auto-patrol.
AI Port - Transform Legacy Cameras
The AI Port at $199 is a game-changing accessory that brings advanced AI capabilities to older UniFi cameras (G3/G4/G5) and third-party ONVIF cameras. Features include:
- Face Recognition: Add advanced facial recognition capabilities to legacy cameras
- License Plate Detection: Enable LPR functionality on older camera models
- ONVIF Camera Support: Integrate third-party cameras with AI analytics
- Edge Recording: MicroSD slot for local backup recording (future firmware update)
- PTZ Control: Support for PTZ controls on compatible ONVIF cameras
- Flexible Power: PoE+ powered with support for cameras up to 25.5W
Storage Considerations
The amount of storage you need depends on the number of cameras, recording resolution, frame rate, and how long you want to retain recordings. UniFi Protect 5.0 now includes advanced memory management features that allow you to optimize storage usage more effectively.
- Hard Drive Selection: Opt for surveillance-grade drives when choosing hard drives for your UniFi OS Console. These drives are designed for 24/7 operation and are more reliable than standard desktop hard drives. Major manufacturers like Seagate (SkyHawk) and Western Digital (Purple) offer drives specifically designed for surveillance systems.
- Advanced Memory Management: UniFi Protect 6.0 introduces intelligent storage policies. You can set different retention periods for high-quality versus low-quality recordings, maximizing storage efficiency while preserving critical footage longer.
Step-by-Step Installation
With your equipment selected, it's time to begin the installation process. This involves physically mounting and connecting your cameras and configuring the UniFi Protect software.
Physical Installation
Mounting Cameras:
- Tools Required: Gather the necessary tools, typically including a drill, drill bits (appropriate for your mounting surface), a screwdriver, a level, a pencil or marker, and possibly wall anchors.
- Step-by-Step Mounting Instructions: Each camera model will have specific mounting instructions, usually found in the box or available online. Generally, this involves:
- Positioning the Mount: Use the included mounting template (if provided) to mark the screw hole locations on the wall or ceiling.
- Drilling Holes: Drill pilot holes at the marked locations. If mounting into drywall or masonry, use wall anchors.
- Securing the Mount: Attach the camera mount to the surface using appropriate screws. Ensure it's firmly secured and level.
- Attaching the Camera: Connect the camera to the mount, following the camera-specific instructions.
- Weatherproofing: Ensure all connections and openings are correctly sealed for outdoor installations to prevent water damage. Use weatherproof enclosures or sealant if necessary.
Cabling:
- Running Ethernet Cables: Run Ethernet cables from your PoE switch or injector to each camera location. Consider using conduits or raceways to protect cables and maintain a neat appearance, especially in exposed areas.
- Connecting to PoE Switch/Injector: Connect one end of each Ethernet cable to a camera and the other to a corresponding port on your PoE switch or injector. Ensure the connections are secure.
Software Configuration
Setting up the UniFi OS Console:
- Initial Setup: Connect your UniFi OS Console to your network (and power it if it doesn't support PoE) and follow the initial setup instructions. This typically involves accessing the console's web interface through a browser and following an on-screen wizard.
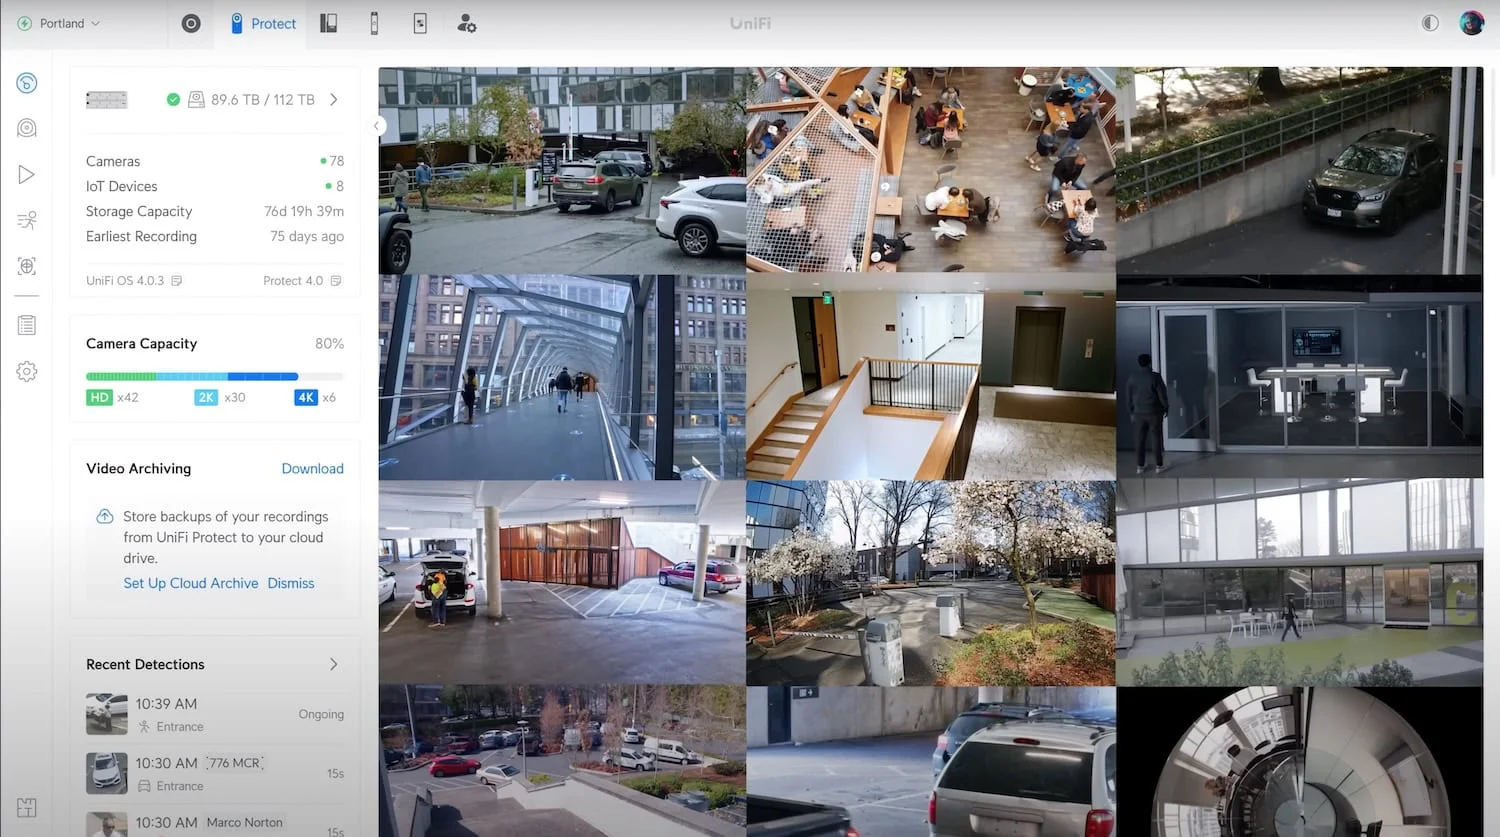
- UniFi OS Interface: Familiarize yourself with the UniFi OS interface. This is where you'll manage all your UniFi devices, including your cameras.
Adopting Cameras:
- Discovery Process: Once powered on and connected to the network, your cameras should be automatically discovered by the UniFi Protect application within your UniFi OS Console.
- Adoption Process: The UniFi Protect interface shows a list of discovered cameras. Click the "Adopt" button next to each camera to add it to your system.
Basic Camera Settings:
- Naming Cameras: Assign descriptive names to each camera (e.g., "Front Door," "Backyard," "Warehouse Entrance") for easy identification.
- Setting Time Zone and Date: Ensure the correct time zone and date are configured on your UniFi OS Console for accurate timestamping of recordings.
Optimizing Camera Settings for Performance and Storage Efficiency
Once your cameras are installed and adopted, it's important to fine-tune their settings to achieve optimal performance and manage storage effectively.
Video Quality and Storage
- Resolution: Higher resolutions provide more detail but consume more storage space. Consider the specific requirements of each camera location. For general surveillance, 1080p or 2K is often sufficient, while critical areas may benefit from 4K, especially with the new G6 series cameras offering 4K at competitive prices.
- Frame Rate (FPS): A higher frame rate results in smoother video and increases storage usage. For most surveillance scenarios, 15-20 FPS is a good balance between fluidity and storage efficiency. You might choose a higher FPS for areas with fast-moving objects.
- Bitrate: This setting determines the amount of data used to encode each second of video. Higher bitrates generally result in better image quality but consume more storage. UniFi Protect typically offers automatic bitrate adjustment, which is suitable for most cases.
Motion Detection and Recording
- Motion Zones: Define specific areas where motion detection should be active within the camera's field of view. This helps to reduce false alerts triggered by irrelevant movements, such as swaying trees or passing cars outside your property.
- Sensitivity: Adjust the sensitivity of the motion detection to fine-tune its responsiveness. Higher sensitivity detects smaller movements but may increase false alerts. Finding the right balance depends on the specific environment and camera placement.
- Recording Schedules: Configure schedules to record continuously during specific hours (e.g., business hours) and switch to motion-activated recording during other times (e.g., overnight). This helps to conserve storage space while ensuring essential events are captured.
- Smart Detections: Utilize UniFi Protect's AI-powered smart detection features (available on G6, AI series cameras, and legacy cameras with AI Port) to identify specific objects like people, vehicles, or even faces and license plates.
Storage Management
- Recording Modes: UniFi Protect offers different recording modes, including:
- Continuous: The camera records 24/7.
- Motion-Activated: Recording is triggered only when motion is detected.
- Scheduled: Recording occurs only during specified time intervals.
- Retention Policies: Define how long recordings should be stored before being automatically deleted. UniFi Protect 6.0 now allows you to set different retention policies for high-quality versus low-quality recordings.
- Cloud Archive Integration: UniFi Protect 6.0 introduces the ability to automatically archive recordings to Google Drive for off-site storage and additional redundancy.
ONVIF Integration and Third-Party Camera Support
One of the most significant updates in UniFi Protect 5.0 is the introduction of ONVIF (Open Network Video Interface Forum) support, which allows the integration of third-party cameras from other manufacturers.
ONVIF Camera Integration
- Universal Compatibility: Add ONVIF-compliant cameras from any manufacturer to your UniFi Protect system without additional licensing fees.
- Gradual Migration: This feature allows you to maintain existing camera investments while gradually transitioning to UniFi cameras, providing a cost-effective upgrade path.
- Setup Process: Enable "Discover Third-Party Cameras" in UniFi Protect settings, ensure your ONVIF cameras are properly configured with authentication, and they should appear for adoption in the UniFi Devices page.
- Current Limitations: While basic live view and recording work well, advanced features like motion detection, audio, and some PTZ controls may be limited on third-party cameras. These limitations are expected to improve with future updates.
AI Port Enhancement
- Legacy Camera Revival: The AI Port transforms older G3, G4, and G5 cameras into smart devices with face recognition, license plate detection, and advanced analytics.
- ONVIF Camera AI: Connect third-party ONVIF cameras to the AI Port to gain UniFi's advanced AI capabilities.
- Future Expansion: Initial release supports one camera per AI Port, but future updates promise support for multiple cameras per device.
Monitoring and Maintenance
Regular monitoring and maintenance are crucial for ensuring the continued effectiveness and reliability of your UniFi Protect system.
Regular System Checks
- Live View: Periodically check each camera's live view to ensure it is functioning correctly and has a clear, unobstructed view.
- Recording Playback: Test playback of recent recordings to verify that the system is recording properly and that the image quality meets your expectations.
- System Logs: Review system logs within the UniFi OS Console for any error messages or alerts that might indicate a problem.
- AI Detection Performance: Monitor the performance of face recognition and license plate detection features, adjusting sensitivity settings as needed.
Firmware and Software Updates
- Importance of Updates: Ubiquiti regularly releases firmware updates for its cameras and software updates for the UniFi OS Console. These updates often include critical security patches, performance improvements, and new features like the recent ONVIF support.
- Update Process: The UniFi OS Console provides a convenient way to update the firmware of your cameras and the console's software. It's generally recommended to enable automatic updates or to check for updates manually regularly.
Troubleshooting
Common issues and solutions:
- Camera Offline: Check network connectivity, PoE power, and cabling.
- Poor Image Quality: Adjust camera settings (resolution, bitrate, focus), check for obstructions, and ensure adequate lighting.
- Recording Issues: Verify storage capacity, retention policies, and recording settings.
- ONVIF Camera Problems: Verify ONVIF is enabled on the camera, check authentication credentials, and ensure correct date/time settings.
The Ubiquiti Community forums are an excellent resource for troubleshooting tips and advice from other UniFi users.
Cost Analysis and Budgeting
One key advantage of the UniFi Protect system is its cost-effectiveness compared to traditional CCTV solutions and subscription-based cloud cameras.
Breakdown of Costs
Cameras (2025 Pricing):
- G6 Series: G6 Bullet and G6 Turret at $199 each, G6 Instant at $179
- G5 Series: Entry-level cameras like the G5 Flex starting around $129
- AI Series: Premium cameras like the AI Pro around $499, AI PTZ Industrial at $1,299
- PTZ Options: G5 PTZ at $299, G6 PTZ at $399
UniFi OS Console:
- Cloud Key Gen2 Plus: Around $249
- Dream Machine Pro: Around $379
- Dream Machine Pro SE: Around $499
- Dream Machine Max: Around $599
- UNVR: Around $299
- UNVR Pro: Around $999
Additional Costs:
- AI Port Enhancement: $199 (transforms legacy cameras with AI capabilities)
- Storage: Surveillance-grade hard drives typically cost $60 for a 1TB drive and over $400 for larger 8TB+ drives
- PoE Switch/Injector: PoE switches cost under $100 for basic 8-port models and several hundred dollars for higher-capacity managed switches
- Cabling and Accessories: Estimate $20-$150 for Ethernet cables, depending on length and quality
Comparison with Other Solutions
- Traditional CCTV Systems: Traditional analog CCTV systems often involve higher upfront costs for equipment, including a dedicated DVR, cameras, and cabling. They may also require professional installation, adding to the overall expense.
- Subscription-Based Cloud Cameras: While cloud cameras may have lower upfront costs, they typically require ongoing monthly subscription fees for video storage and access to advanced features. These recurring costs can quickly surpass the total cost of a UniFi Protect system over time.
Example Budget Scenarios
Small Setup (Home or Small Office):
- 1 x Cloud Key Gen 2 Plus ($249)
- 3 x G6 Bullets ($199 each = $597)
- 1 x 2TB Surveillance Hard Drive ($80)
- Estimated Total: $926
Medium Setup (Small to Medium Business):
- 1 x Dream Machine Pro ($379)
- 6 x G6 Turrets ($199 each = $1,194)
- 1 x 4TB Surveillance Hard Drive ($120)
- Estimated Total: $1,693
Large Setup (Large Business):
- 1 x UNVR-Pro ($999)
- 15 x G6 Bullets ($199 each = $2,985)
- 2 x AI PTZ Industrial ($1,299 each = $2,598)
- 4 x 8TB Surveillance Hard Drive ($350 each = $1,400)
- Estimated Total: $7,982
Legacy Upgrade Setup:
- 1 x Dream Machine Pro ($379)
- 4 x existing cameras (no cost)
- 2 x AI Ports ($199 each = $398) to add AI capabilities
- 1 x 2TB Surveillance Hard Drive ($80)
- Estimated Total: $857 (leveraging existing camera investment)
Introducing: Protect Generation 6 Cameras
Leveraging Advanced Features for Enhanced Security
UniFi Protect continues evolving with cutting-edge features beyond basic video recording, providing enhanced security and intelligent monitoring capabilities.
AI-Powered Smart Detection
- Enhanced Face Recognition: Available on AI series cameras, G6 series, and legacy cameras with AI Port. Can identify and label faces, creating a comprehensive database of recognized individuals. Set up Person of Interest alerts to receive immediate notifications when specific individuals are detected.
- Advanced License Plate Recognition (LPR): The latest cameras and AI Port provide enhanced LPR capabilities with improved accuracy for vehicles in motion and various lighting conditions. Particularly useful for parking areas, driveways, and business entrances.
- Multi-Object Detection: In addition to standard person, vehicle, and animal detection, newer systems can classify vehicles by type and color, making incident investigation more efficient.
- Audio Classification: Detect specific audio events like glass breaking, speaking, or car alarms, adding another layer of intelligent monitoring.
- Cross-Camera Analytics: Track individuals across multiple cameras using AI-powered person re-identification, creating comprehensive movement patterns and timelines.
Third-Party Camera Integration
- ONVIF Universal Compatibility: UniFi Protect 5.0's ONVIF support allows integration of cameras from any manufacturer that supports the ONVIF standard, protecting existing camera investments.
- AI Port Enhancement: The $199 AI Port brings advanced AI capabilities to legacy UniFi cameras and third-party ONVIF cameras, significantly extending their useful life.
- Gradual Migration Strategy: Maintain existing camera investments while gradually transitioning to UniFi cameras, providing a cost-effective upgrade path.
- Unified Management: Manage UniFi and third-party cameras through a single interface, streamlining administration and monitoring.
Enhanced Storage and Archive Management
- Advanced Memory Management: Set different retention periods for high-quality versus low-quality recordings, optimizing storage usage while ensuring critical footage is preserved longer.
- Cloud Archive Integration: Automatically archive recordings to Google Drive for off-site storage and additional redundancy.
- Edge Recording: AI Port and newer cameras support MicroSD card edge recording for additional reliability and local backup.
- Smart Storage Optimization: Configure intelligent storage policies that automatically adjust recording quality and retention based on available space.
Real-Time Alerts and Remote Monitoring
The UniFi Protect mobile app continues to improve with enhanced features:
- View Live Feeds: Access live streams from all your cameras from anywhere with an internet connection.
- Multi-Camera Playback: Review footage from multiple cameras simultaneously for comprehensive incident investigation.
- Receive Advanced Notifications: Get instant alerts for face recognition matches, license plate detections, and custom smart detection events.
- Two-Way Audio: Communicate through cameras equipped with speakers and microphones.
- Remote PTZ Control: Control PTZ cameras remotely with smooth, responsive operation.
Integration with Other UniFi Devices
- UniFi Access: UniFi Protect integrates seamlessly with UniFi Access door control systems, automatically triggering recordings when doors are accessed.
- UniFi Network: Purpose-built compatibility with UniFi networking equipment ensures optimal performance and reliability of your camera system.
- UniFi Connect: Create custom video walls and monitoring stations using UniFi Connect displays for professional monitoring setups.
Conclusion
UniFi Protect continues to offer a compelling solution for businesses and tech enthusiasts seeking an affordable, scalable, and feature-rich video surveillance system. The 2025 updates, including the G6 camera series, AI Port, and UniFi Protect 5.0 software, have significantly enhanced the platform's capabilities while maintaining its core advantages of no subscription fees, local storage, and ease of use.
Key Advantages
- Enhanced Value Proposition: The G6 series brings premium AI features to cameras under $200
- No Recurring Fees: Significant long-term cost savings compared to cloud-based systems
- Universal Compatibility: ONVIF support allows integration of existing third-party cameras
- AI Innovation: The AI Port extends advanced capabilities to legacy cameras
- Ease of Use: Intuitive interface accessible to both tech enthusiasts and newcomers
- Scalability: Easily add cameras as needs evolve
Final Thoughts
The 2025 UniFi Protect ecosystem represents a significant evolution in accessible professional surveillance technology. With the introduction of the G6 series, ONVIF compatibility, and the innovative AI Port, UniFi Protect offers multiple pathways to advanced security monitoring that can accommodate virtually any budget or existing infrastructure.
Whether you're starting fresh with the latest G6 cameras, upgrading legacy equipment with AI Port, or integrating existing third-party cameras through ONVIF support, UniFi Protect provides a practical and effective way to enhance security without the burden of excessive costs or complex management.
Need Help?
Planning a surveillance system can be complex. You can also book a free site assessment with us, and we can assist you in designing and implementing your system. Our team specializes in UniFi security camera installations throughout Miami and South Florida.
Where to Buy
UniFi Dream Machine Pro: Available at the UniFi Store for $379.
UniFi Dream Machine Pro SE: Available at the UniFi Store for $499.
UniFi Dream Machine Max: Available at the UniFi Store for $599.
This guide reflects current product offerings and policies as of August 2025. Pricing and specifications may change. We may earn affiliate commissions from purchases made through our links, which helps support our independent testing and reviews.
Affiliate Disclosure: This article contains affiliate links. If you make a purchase through these links, we may earn a small commission at no extra cost to you.
Related Articles
More from UniFi Networks
UniFi UNVR Instant Review: The Perfect Entry-Level Camera System for Simple Installations
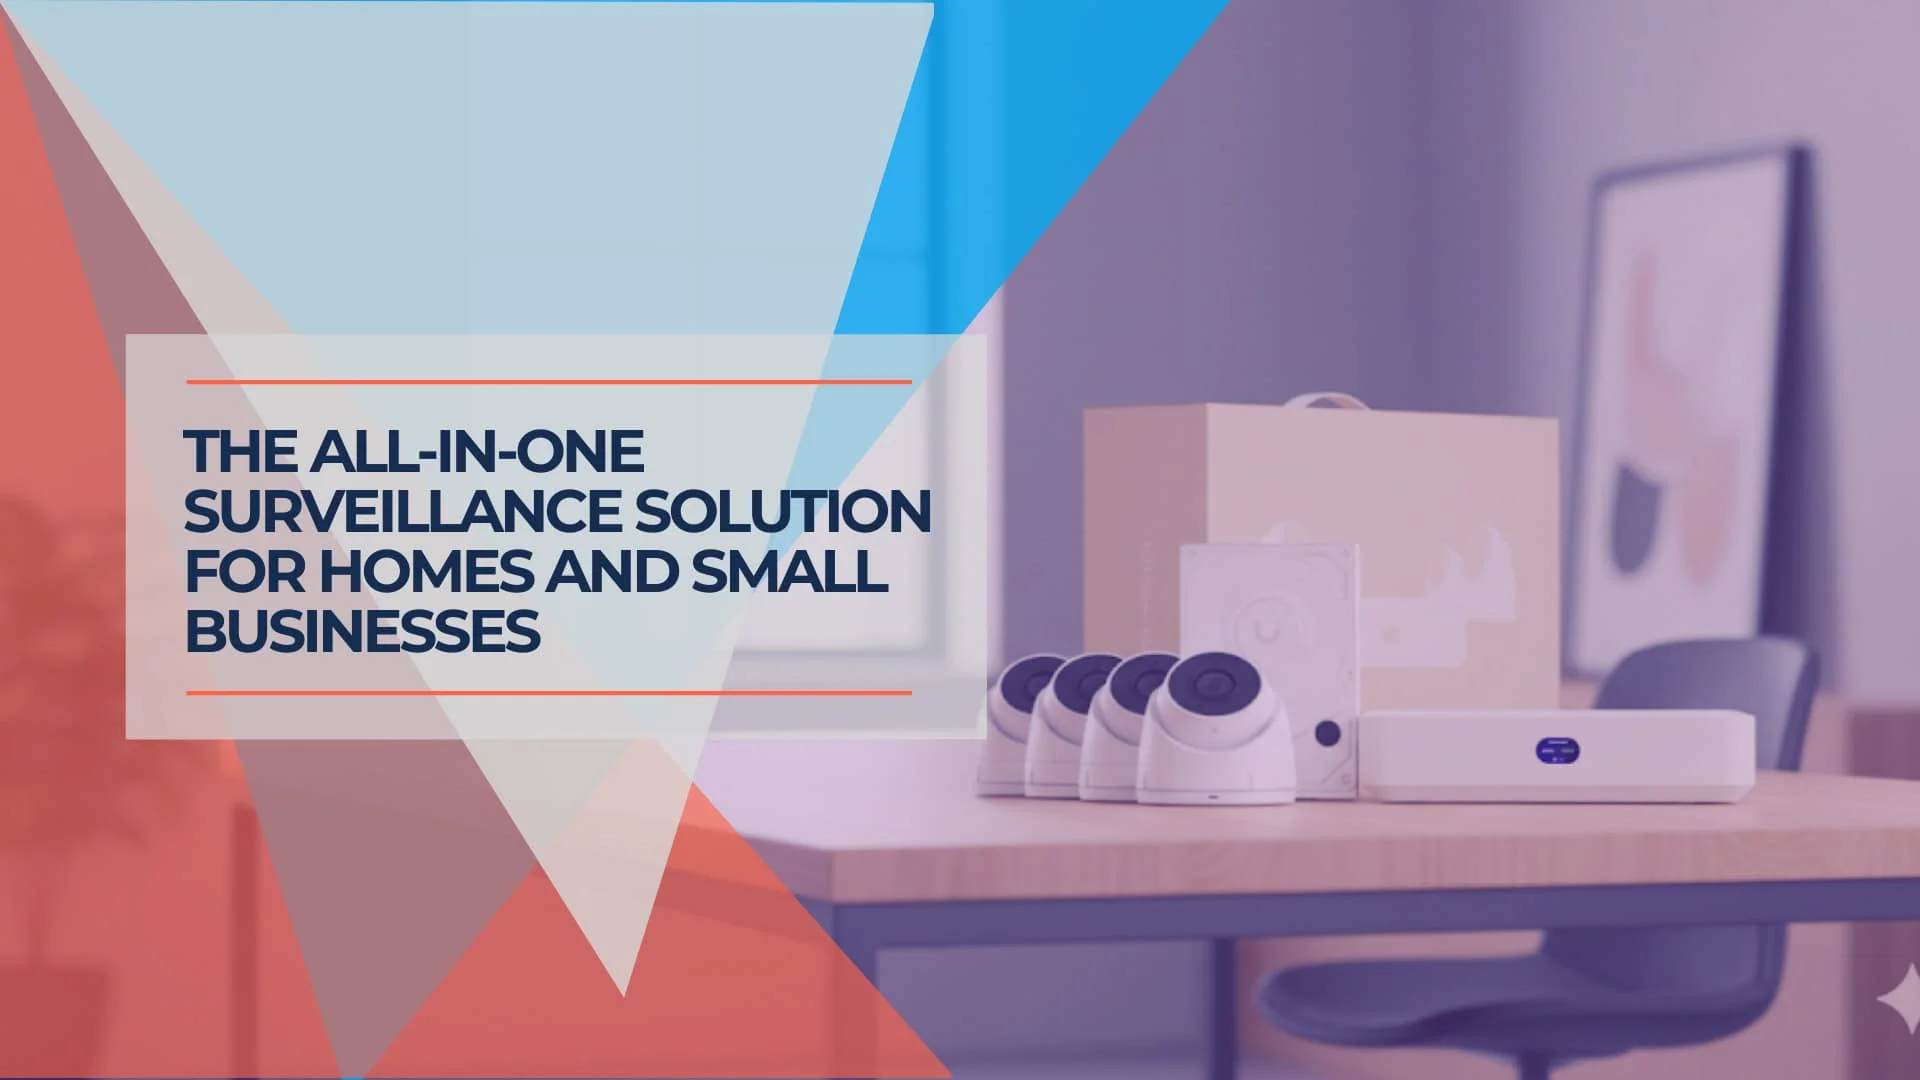
Complete review of the UniFi UNVR Instant NVR with integrated PoE switch. Perfect for residential homes and small businesses needing 4-6 cameras with professional-grade surveillance.
10 min read
UniFi Gateway Selection Guide 2025: When You Need More Than Cloud Gateway Ultra
Complete UniFi gateway comparison from Cloud Gateway Ultra ($129) to Enterprise Fortress Gateway ($1,999). Learn exact thresholds for device count, throughput, and storage needs.
18 min read
UniFi Cloud Gateway Max Review: Small Office Networking Powerhouse
Complete UCG-MAX review with 2025 updates comparing Dream Router 7, UCG Fiber, and Express 7. Features, performance, security analysis, and deployment recommendations.
15 min read